
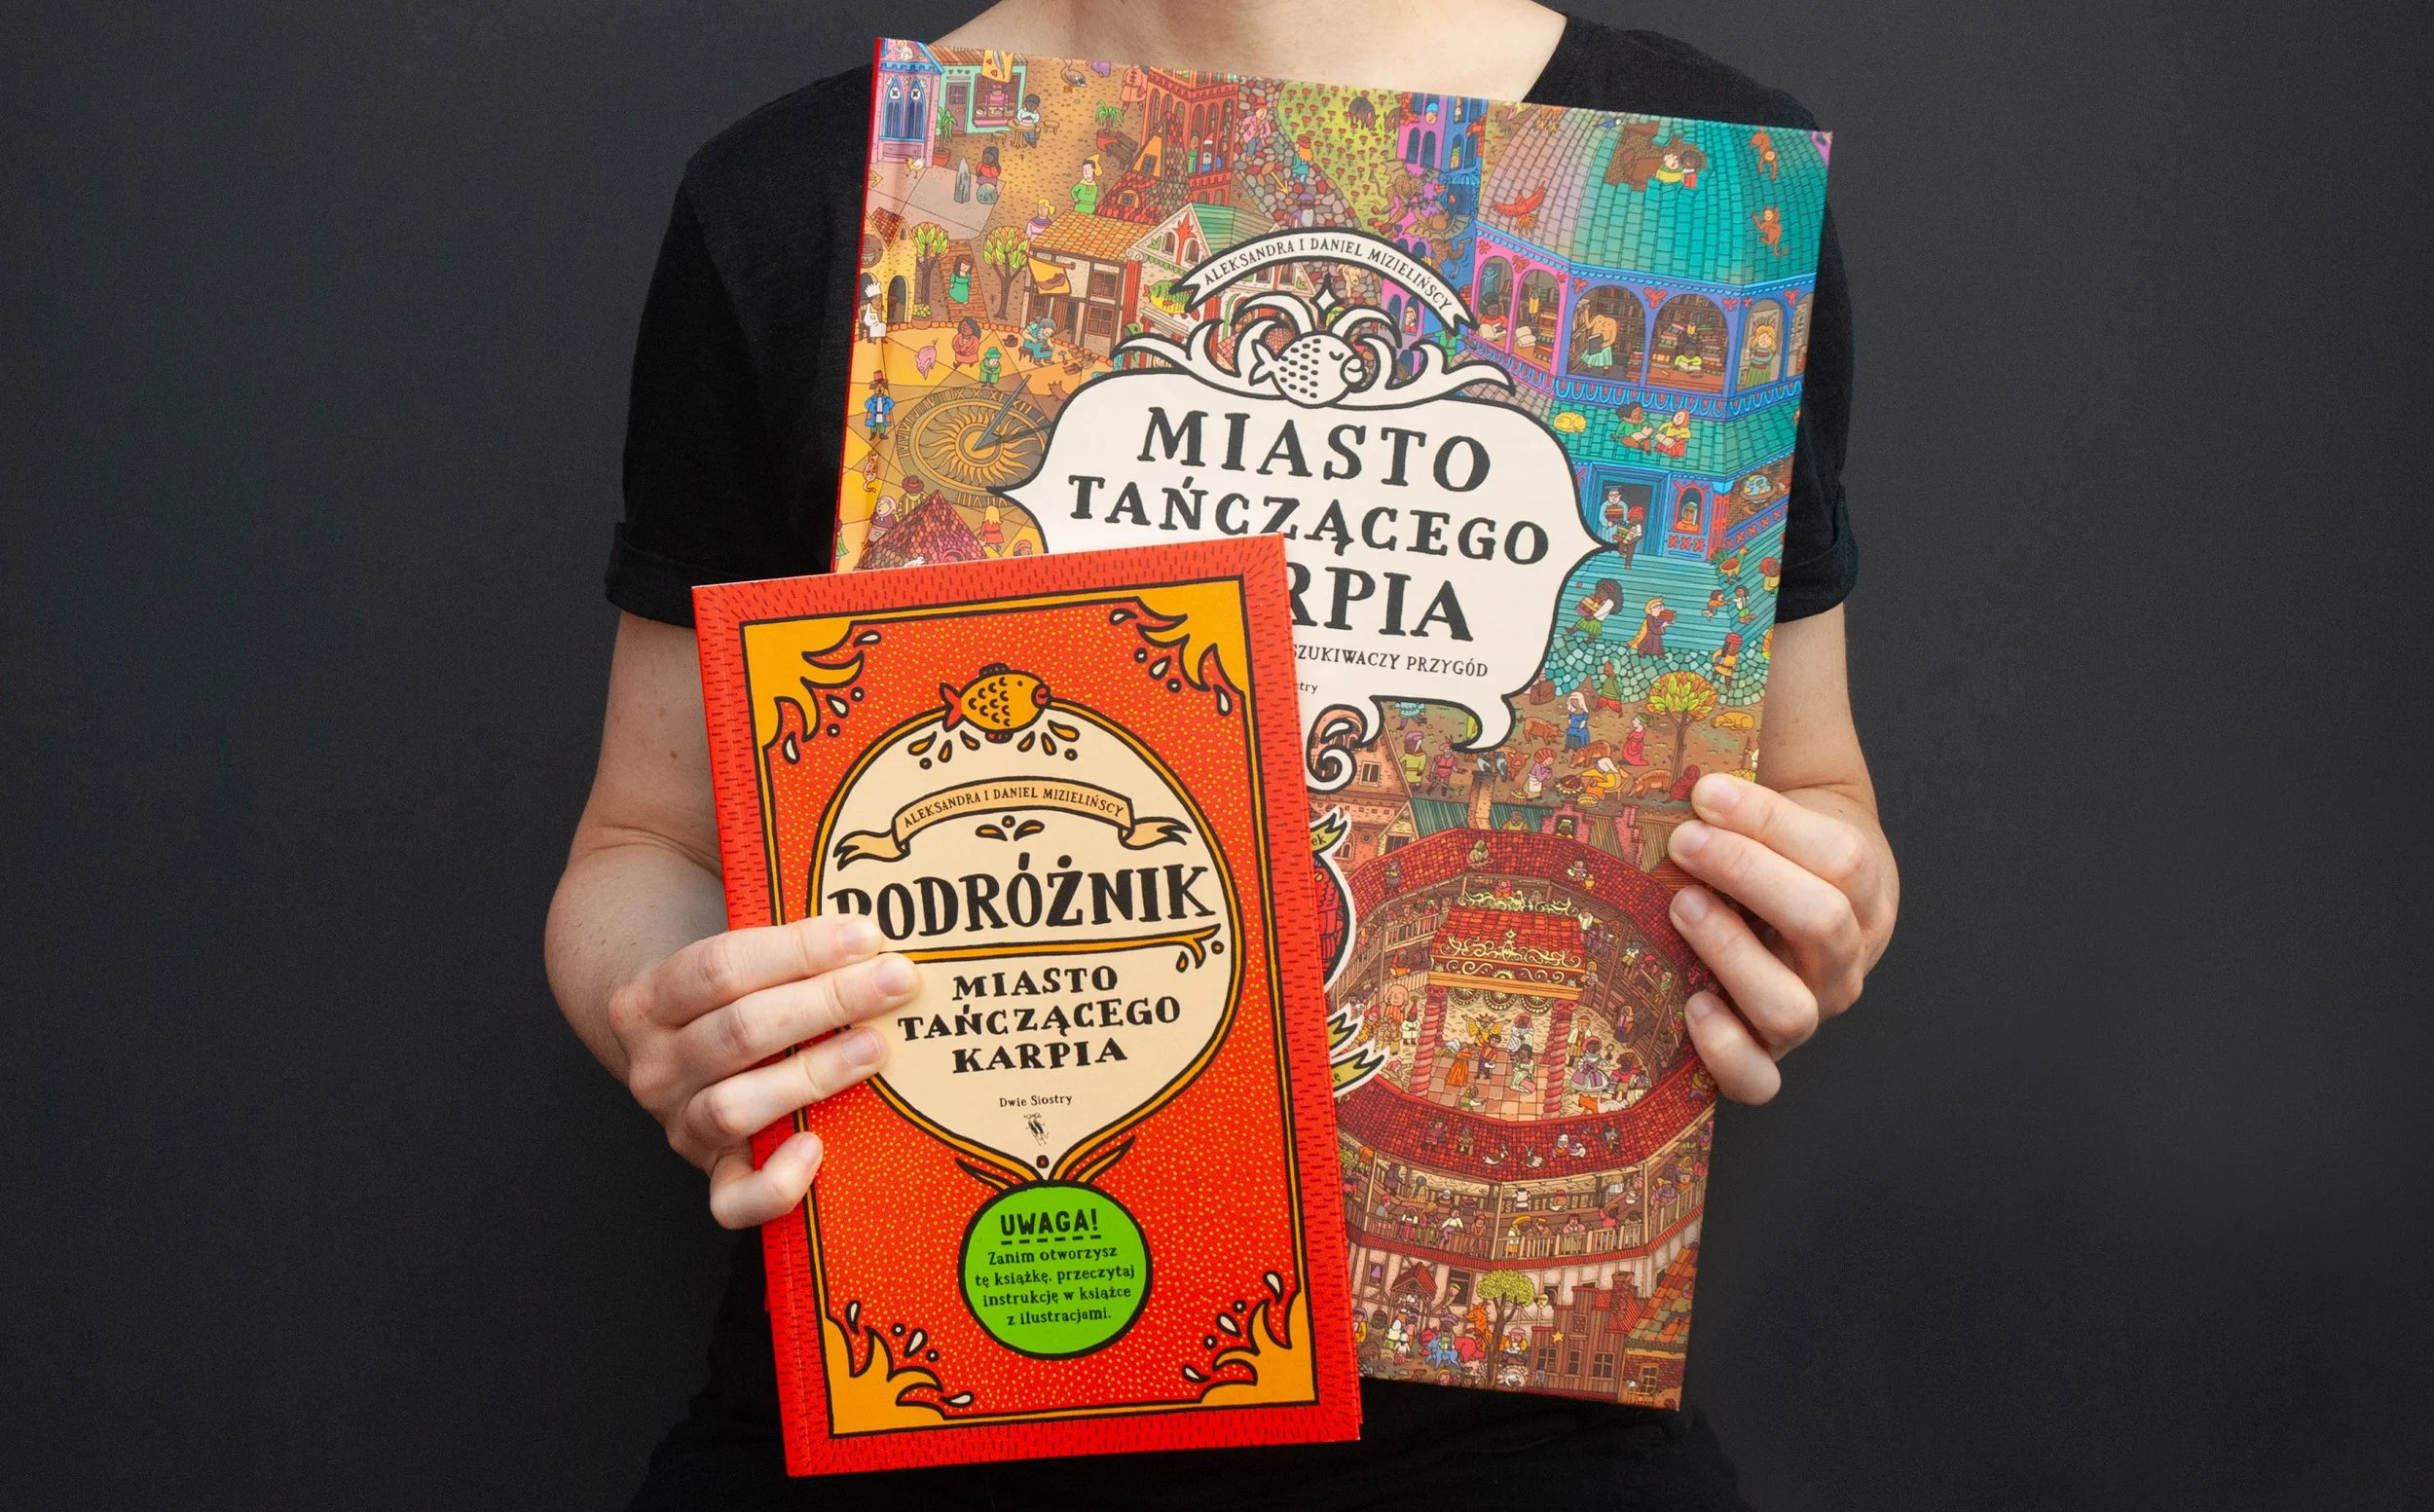
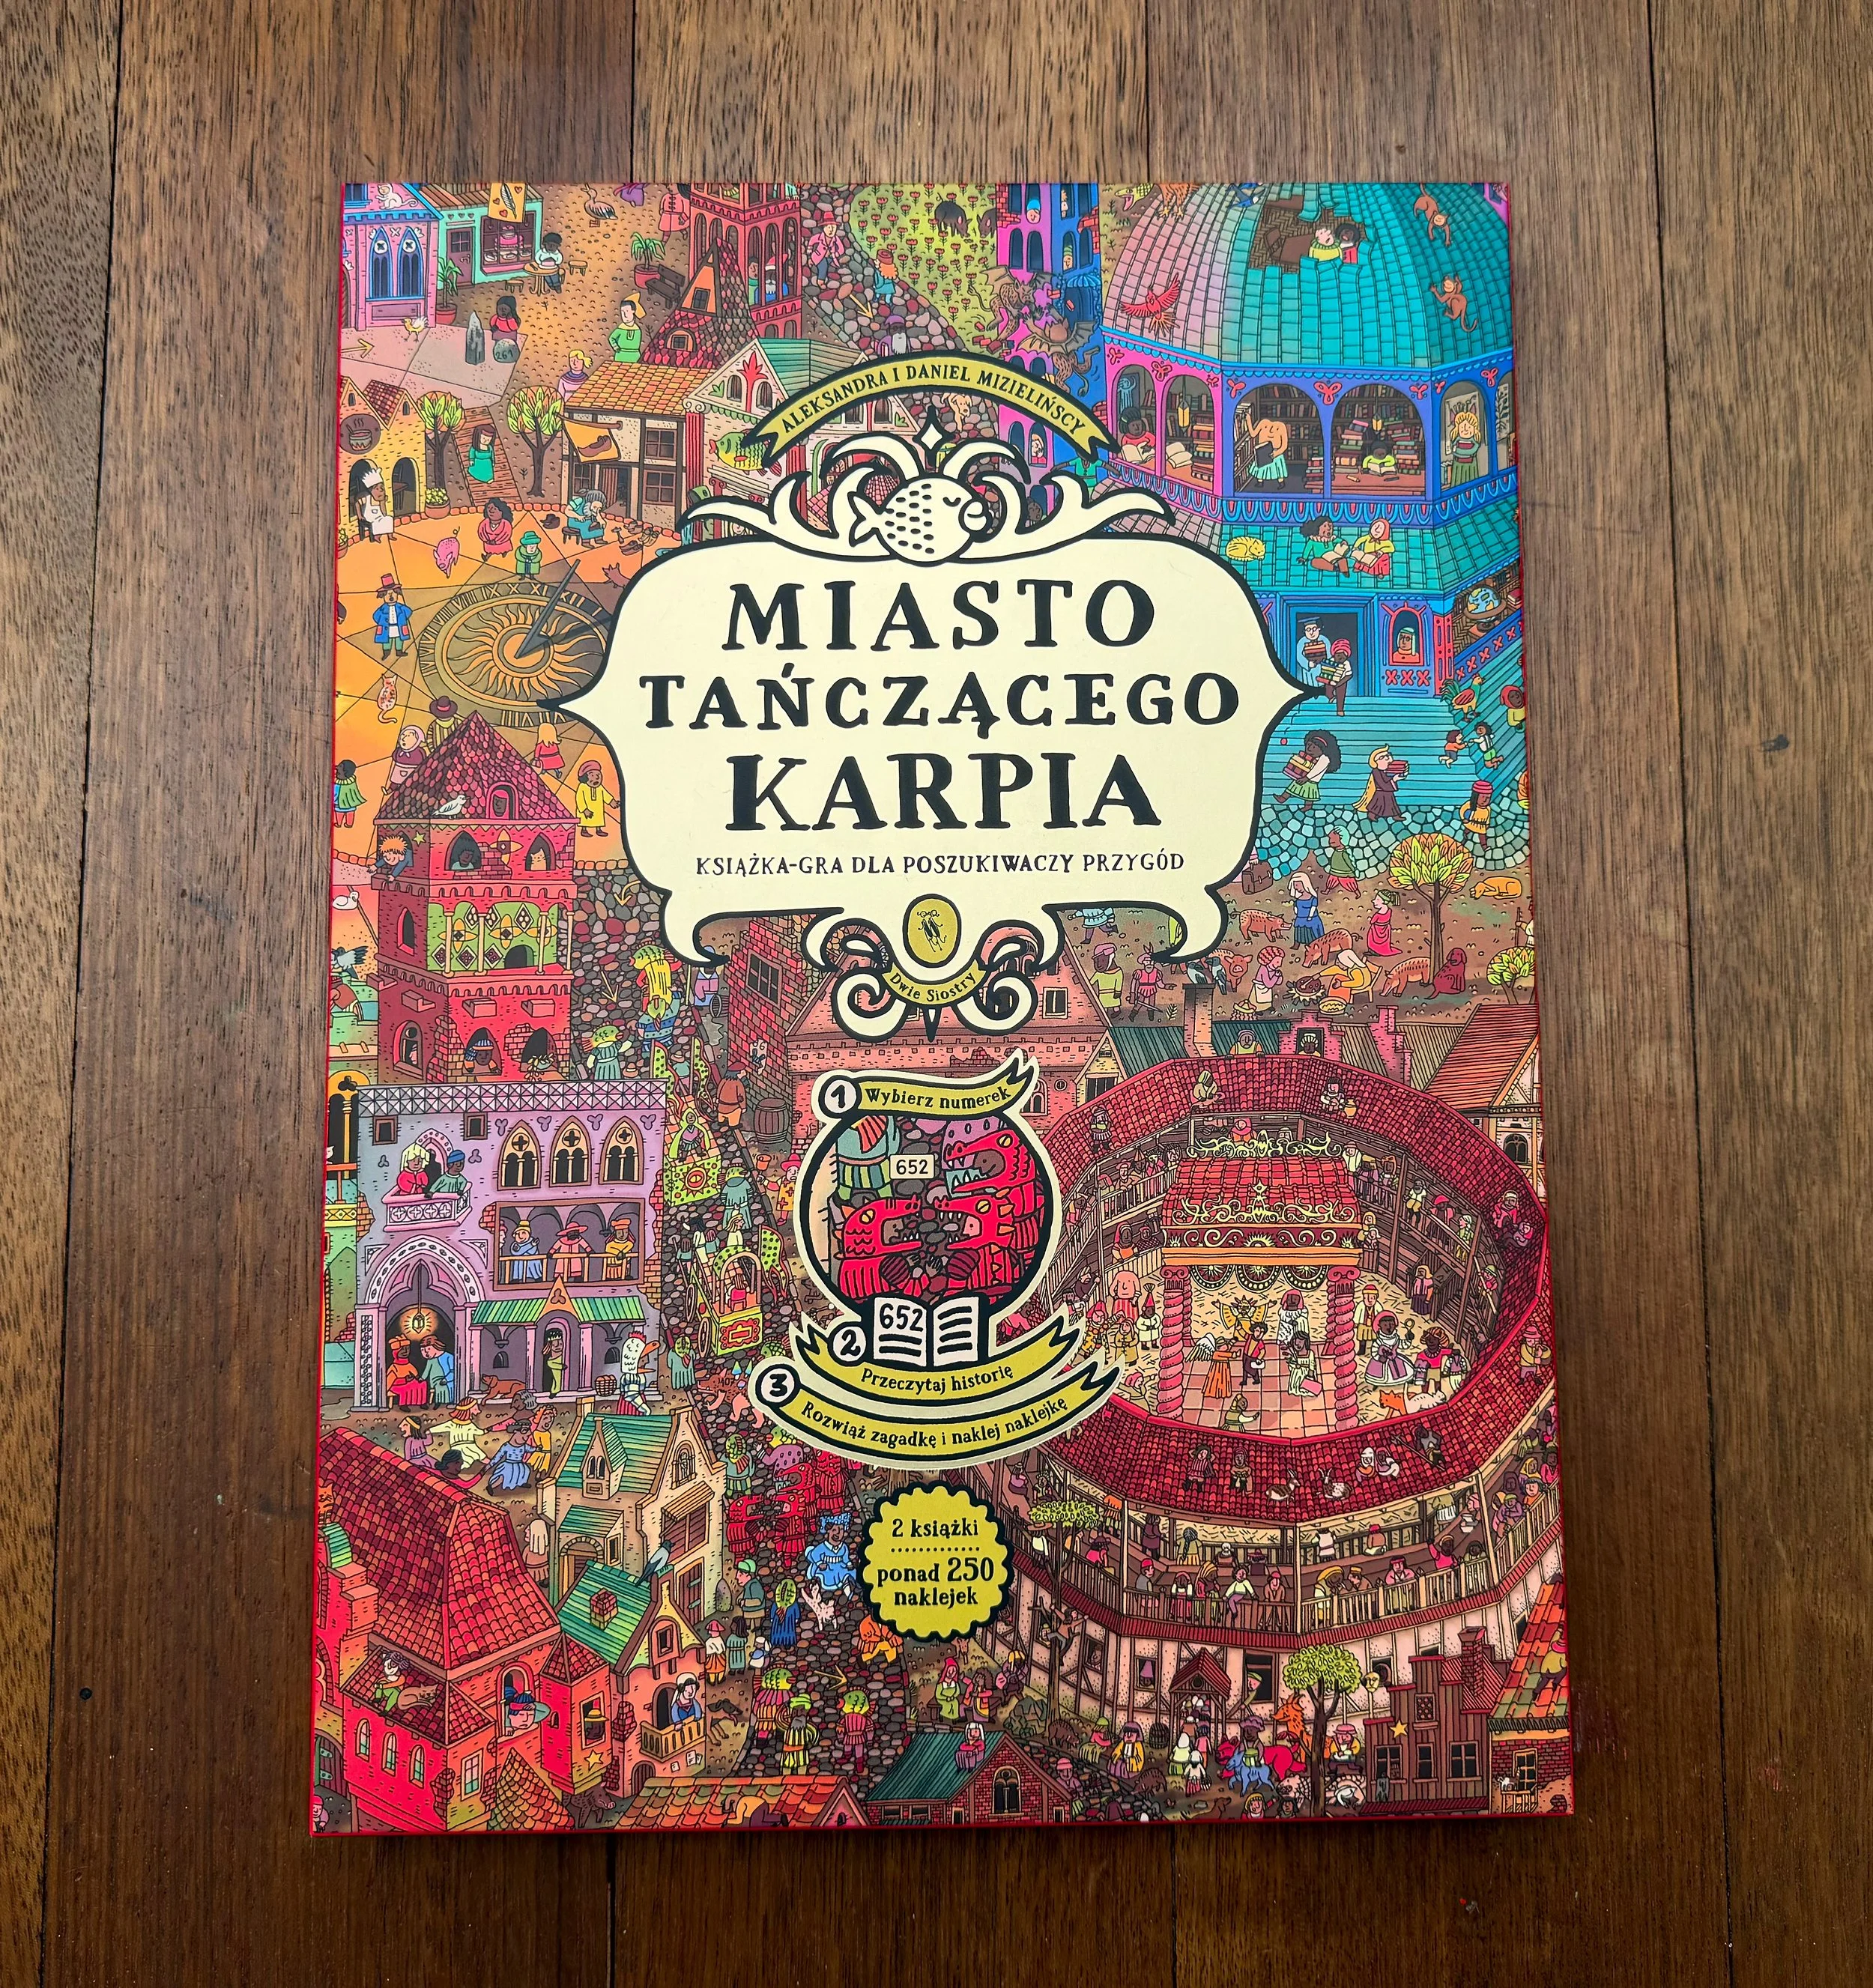
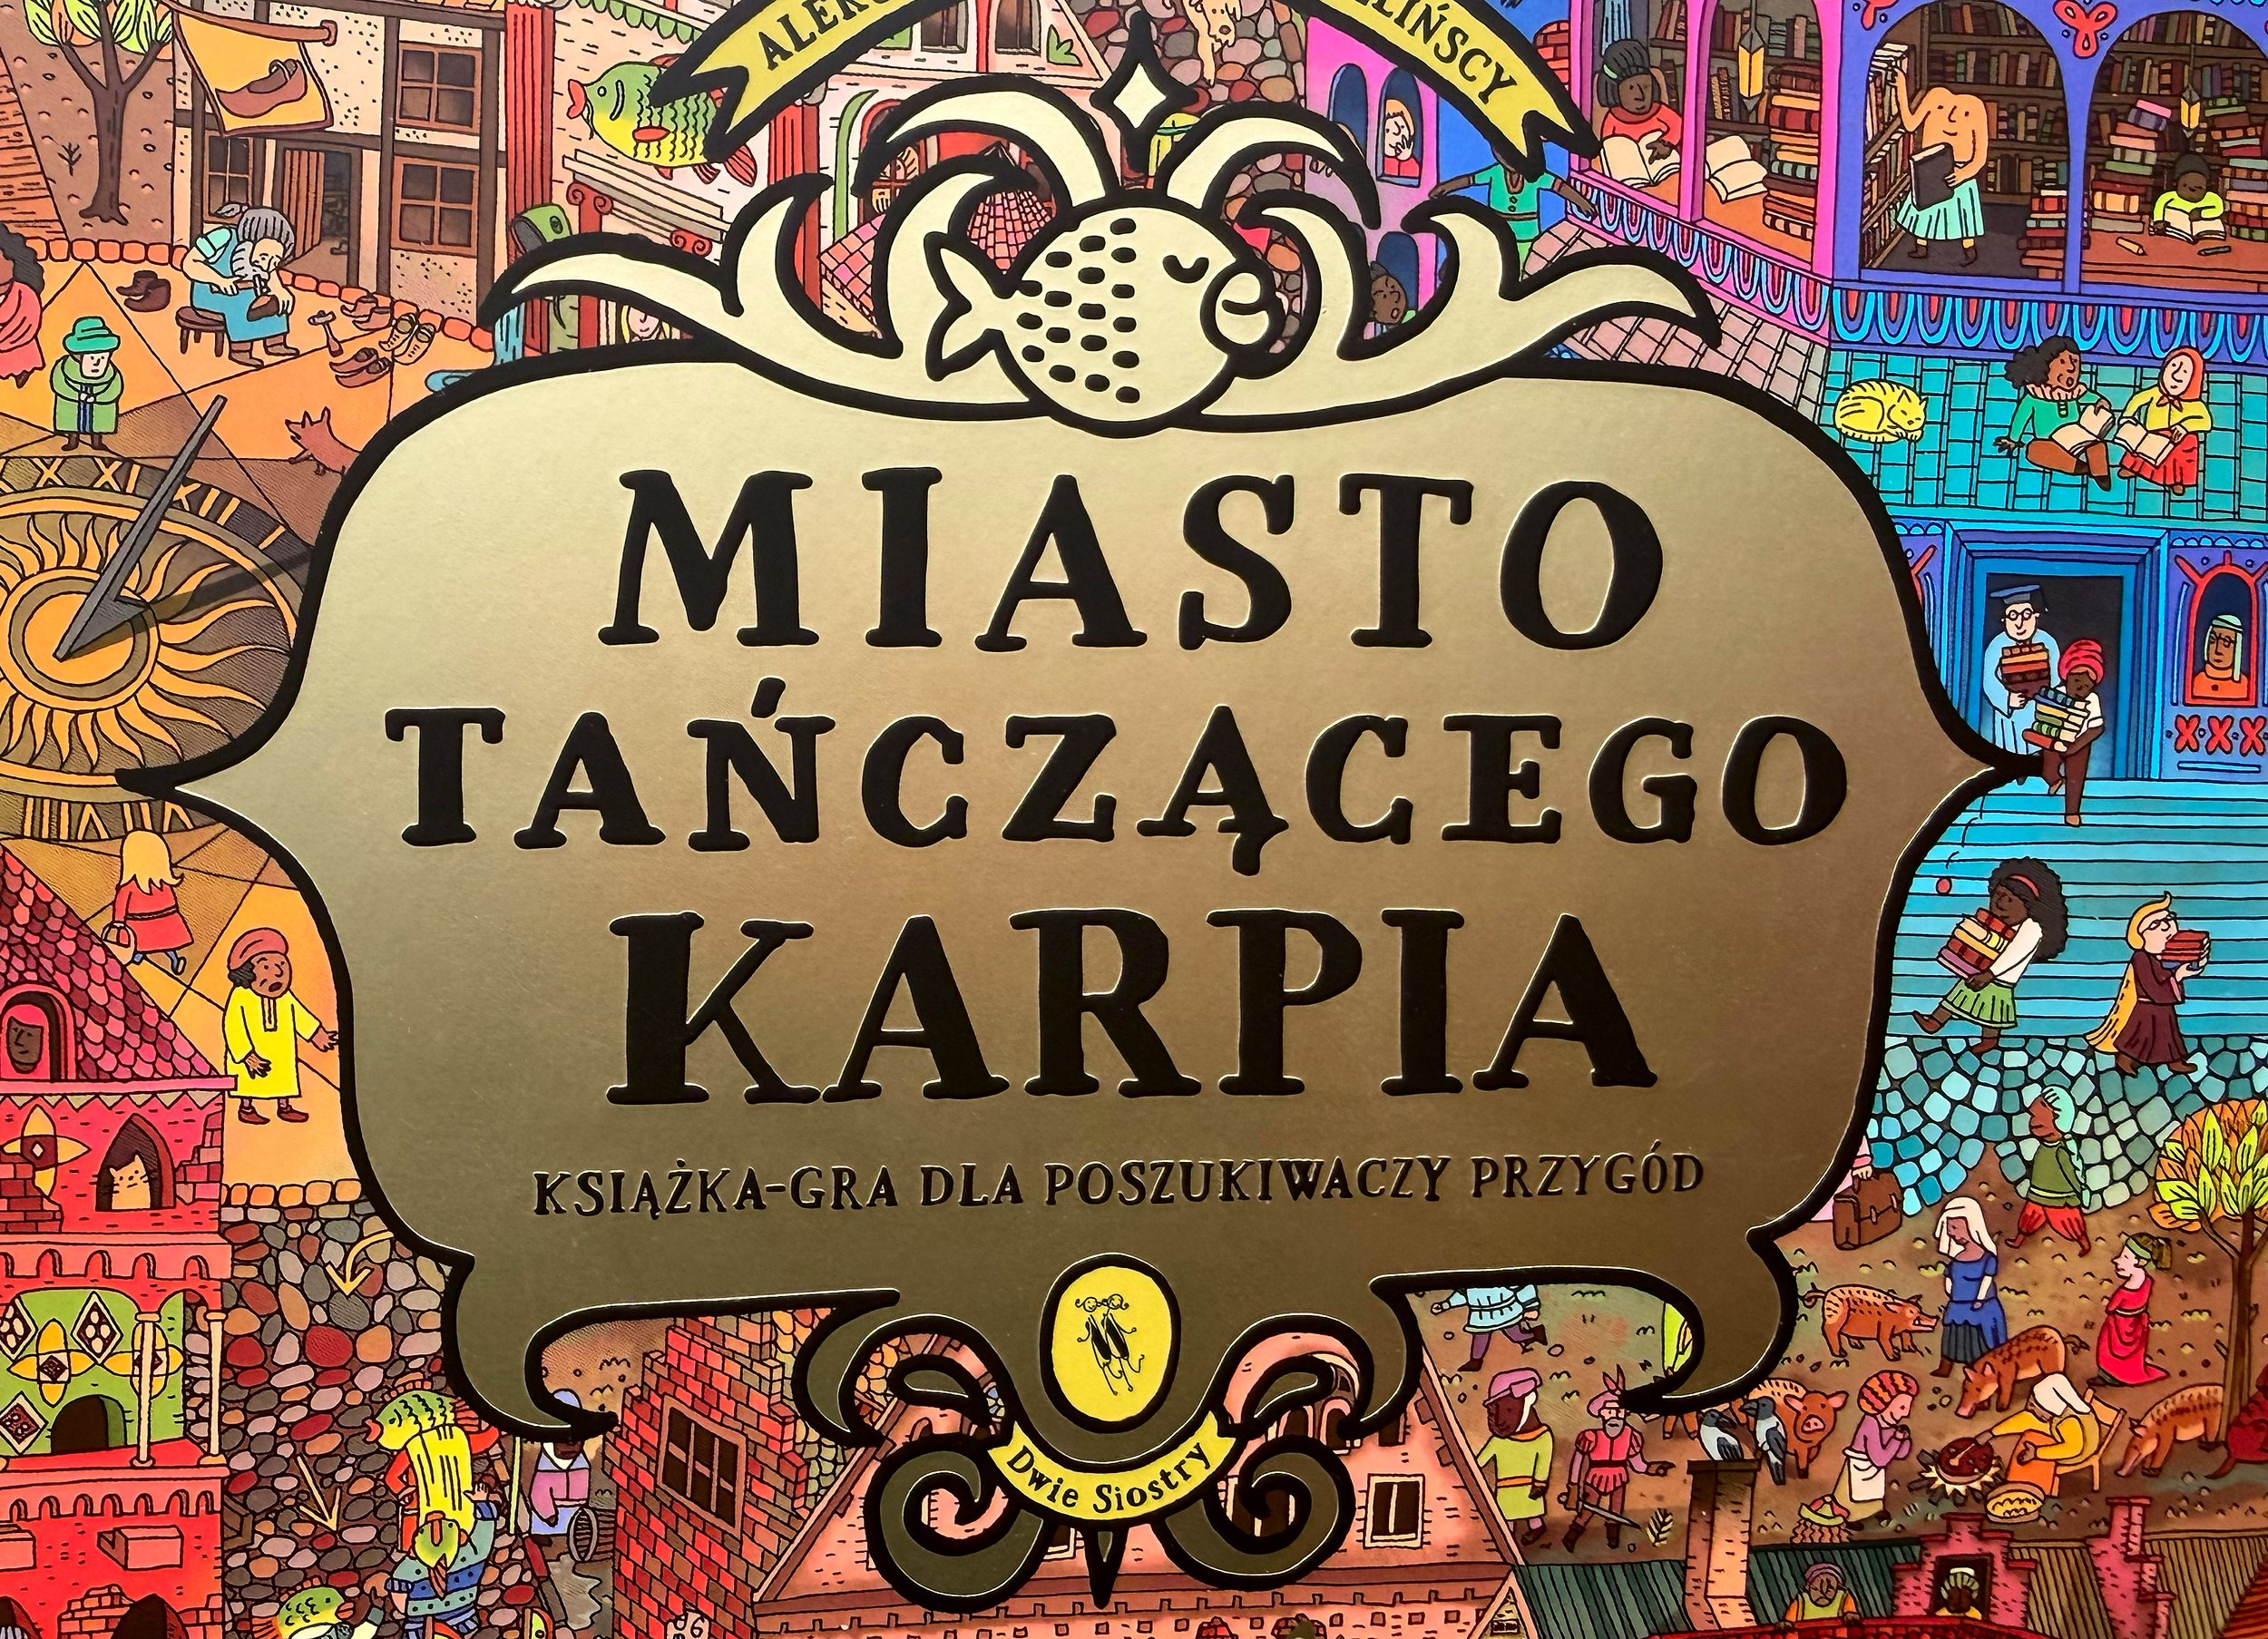
Miasto Tańczącego Karpia
English title: The City of the Dancing Carp
Publisher: Wydawnictwo Dwie Siostry
Warsaw 2024
Illustrated book
Dimensions: 24,5 × 33,8 cm
Hardcover: 56 p.
Textbook (The Traveler)
Dimensions: 15,6 × 24,3 cm
Softcover: 152 p.
7 sheets of stickers (272 stickers)
ISBN: 978-83-8150-638-0
The City of the Dancing Carp is not a typical book. It’s a project that combines our two main passions: picture books and games. Even before creating our first book, we were both designing and coding video games. After our kids were born, and following the success of our book Maps, we put game development on the back burner. But we never stopped playing them. Both video games and board games are a major part of our lives. We literally play board games every day (here are some stats to prove it). Daniel also runs a Game and Comic Book Design Studio at the Academy of Fine Arts in Warsaw. We finally decided to create an interactive book that would combine a few of the mechanics we love.
Before I tell you more about the process of creating and developing The Dancing Carp, let me introduce you to the world of the book.
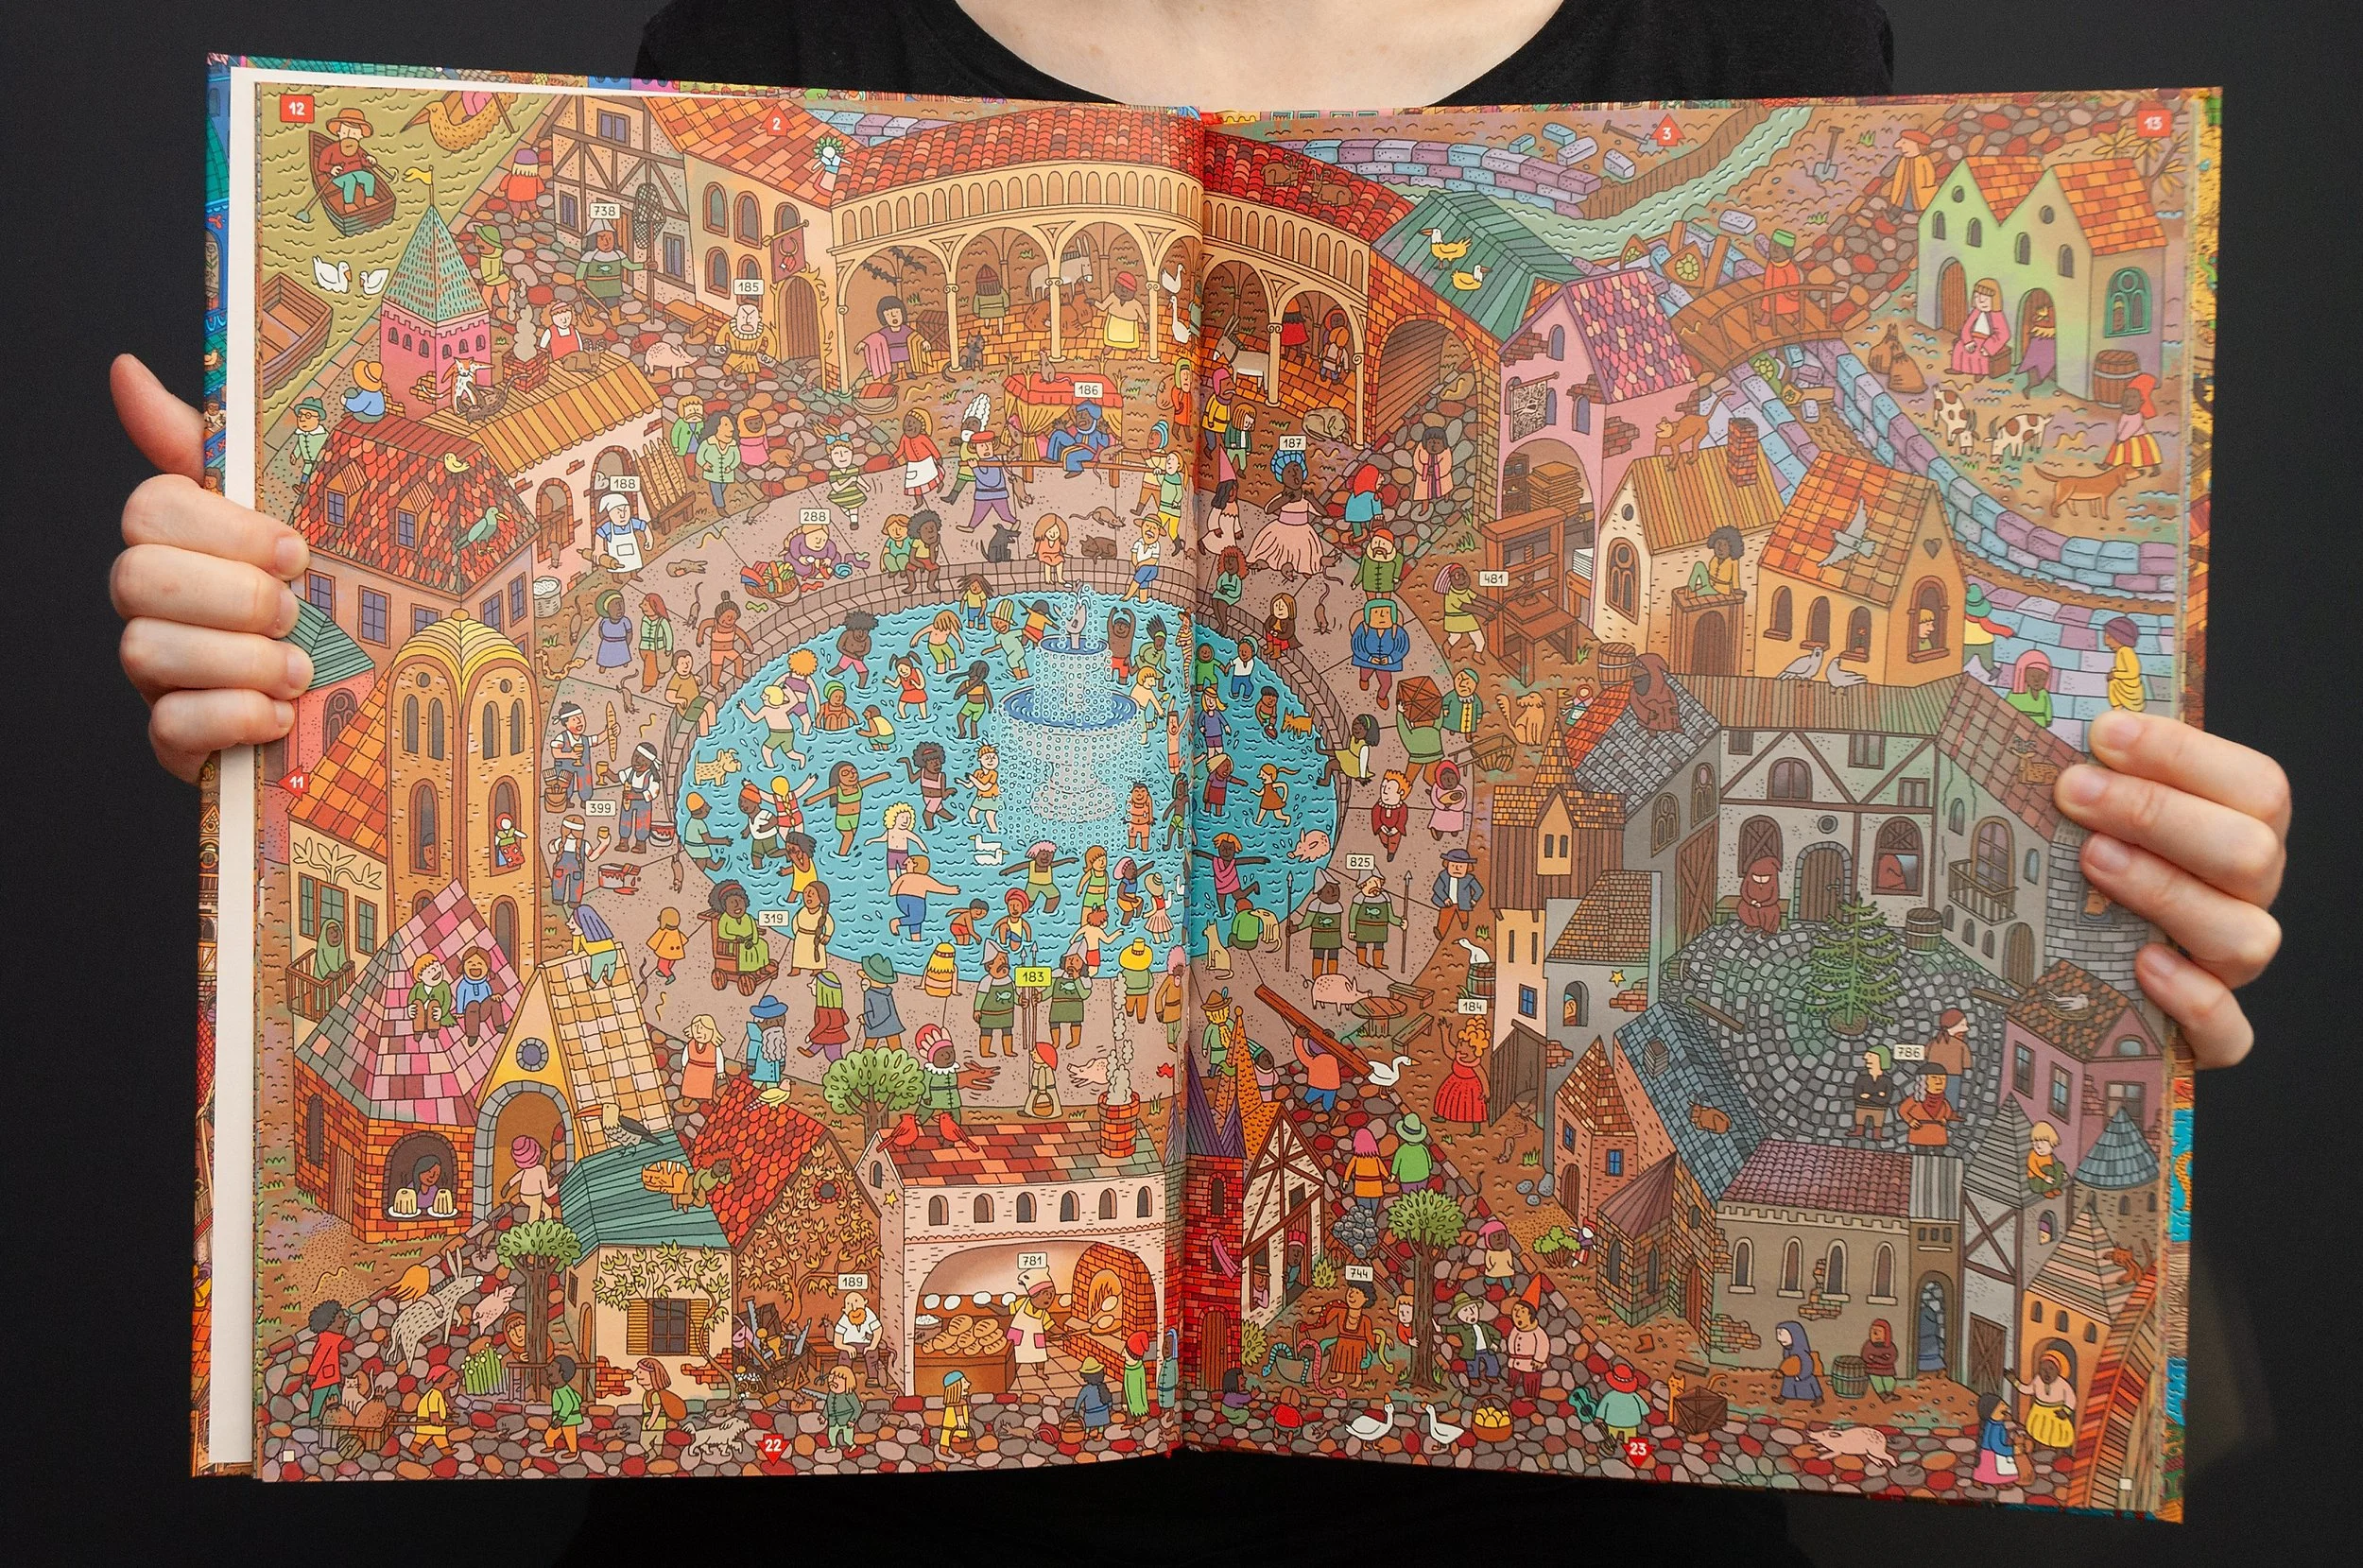
In The City of the Dancing Carp you can venture into the maze of streets in the titular city, talk to its citizens, solve puzzles, and uncover mysteries. Here adventures await you at every turn. But today, every corner of the city vibrates with excitement because tomorrow marks the beginning of the grand festival of the seven-armed orangutan. Everyone is preparing for the arrival of delegations from the other cities. Guests from across the land are coming to showcase their skills, exchange goods, renew long-forgotten friendships, and learn about the latest news from distant lands.
However not everything is going smoothly. At night, the red moon will awaken the werecats, sorceresses are preparing for an impending magical storm, illegal avocado smuggling is flourishing, the salamander knights demand the return of the flaming sickle, and the fortune-teller says that the Gorysz the Giant is seeking revenge for his exile from the city. And that’s just a taste of the troubles waiting to be solved. Will you be able to manage it all? It all hinges on you!


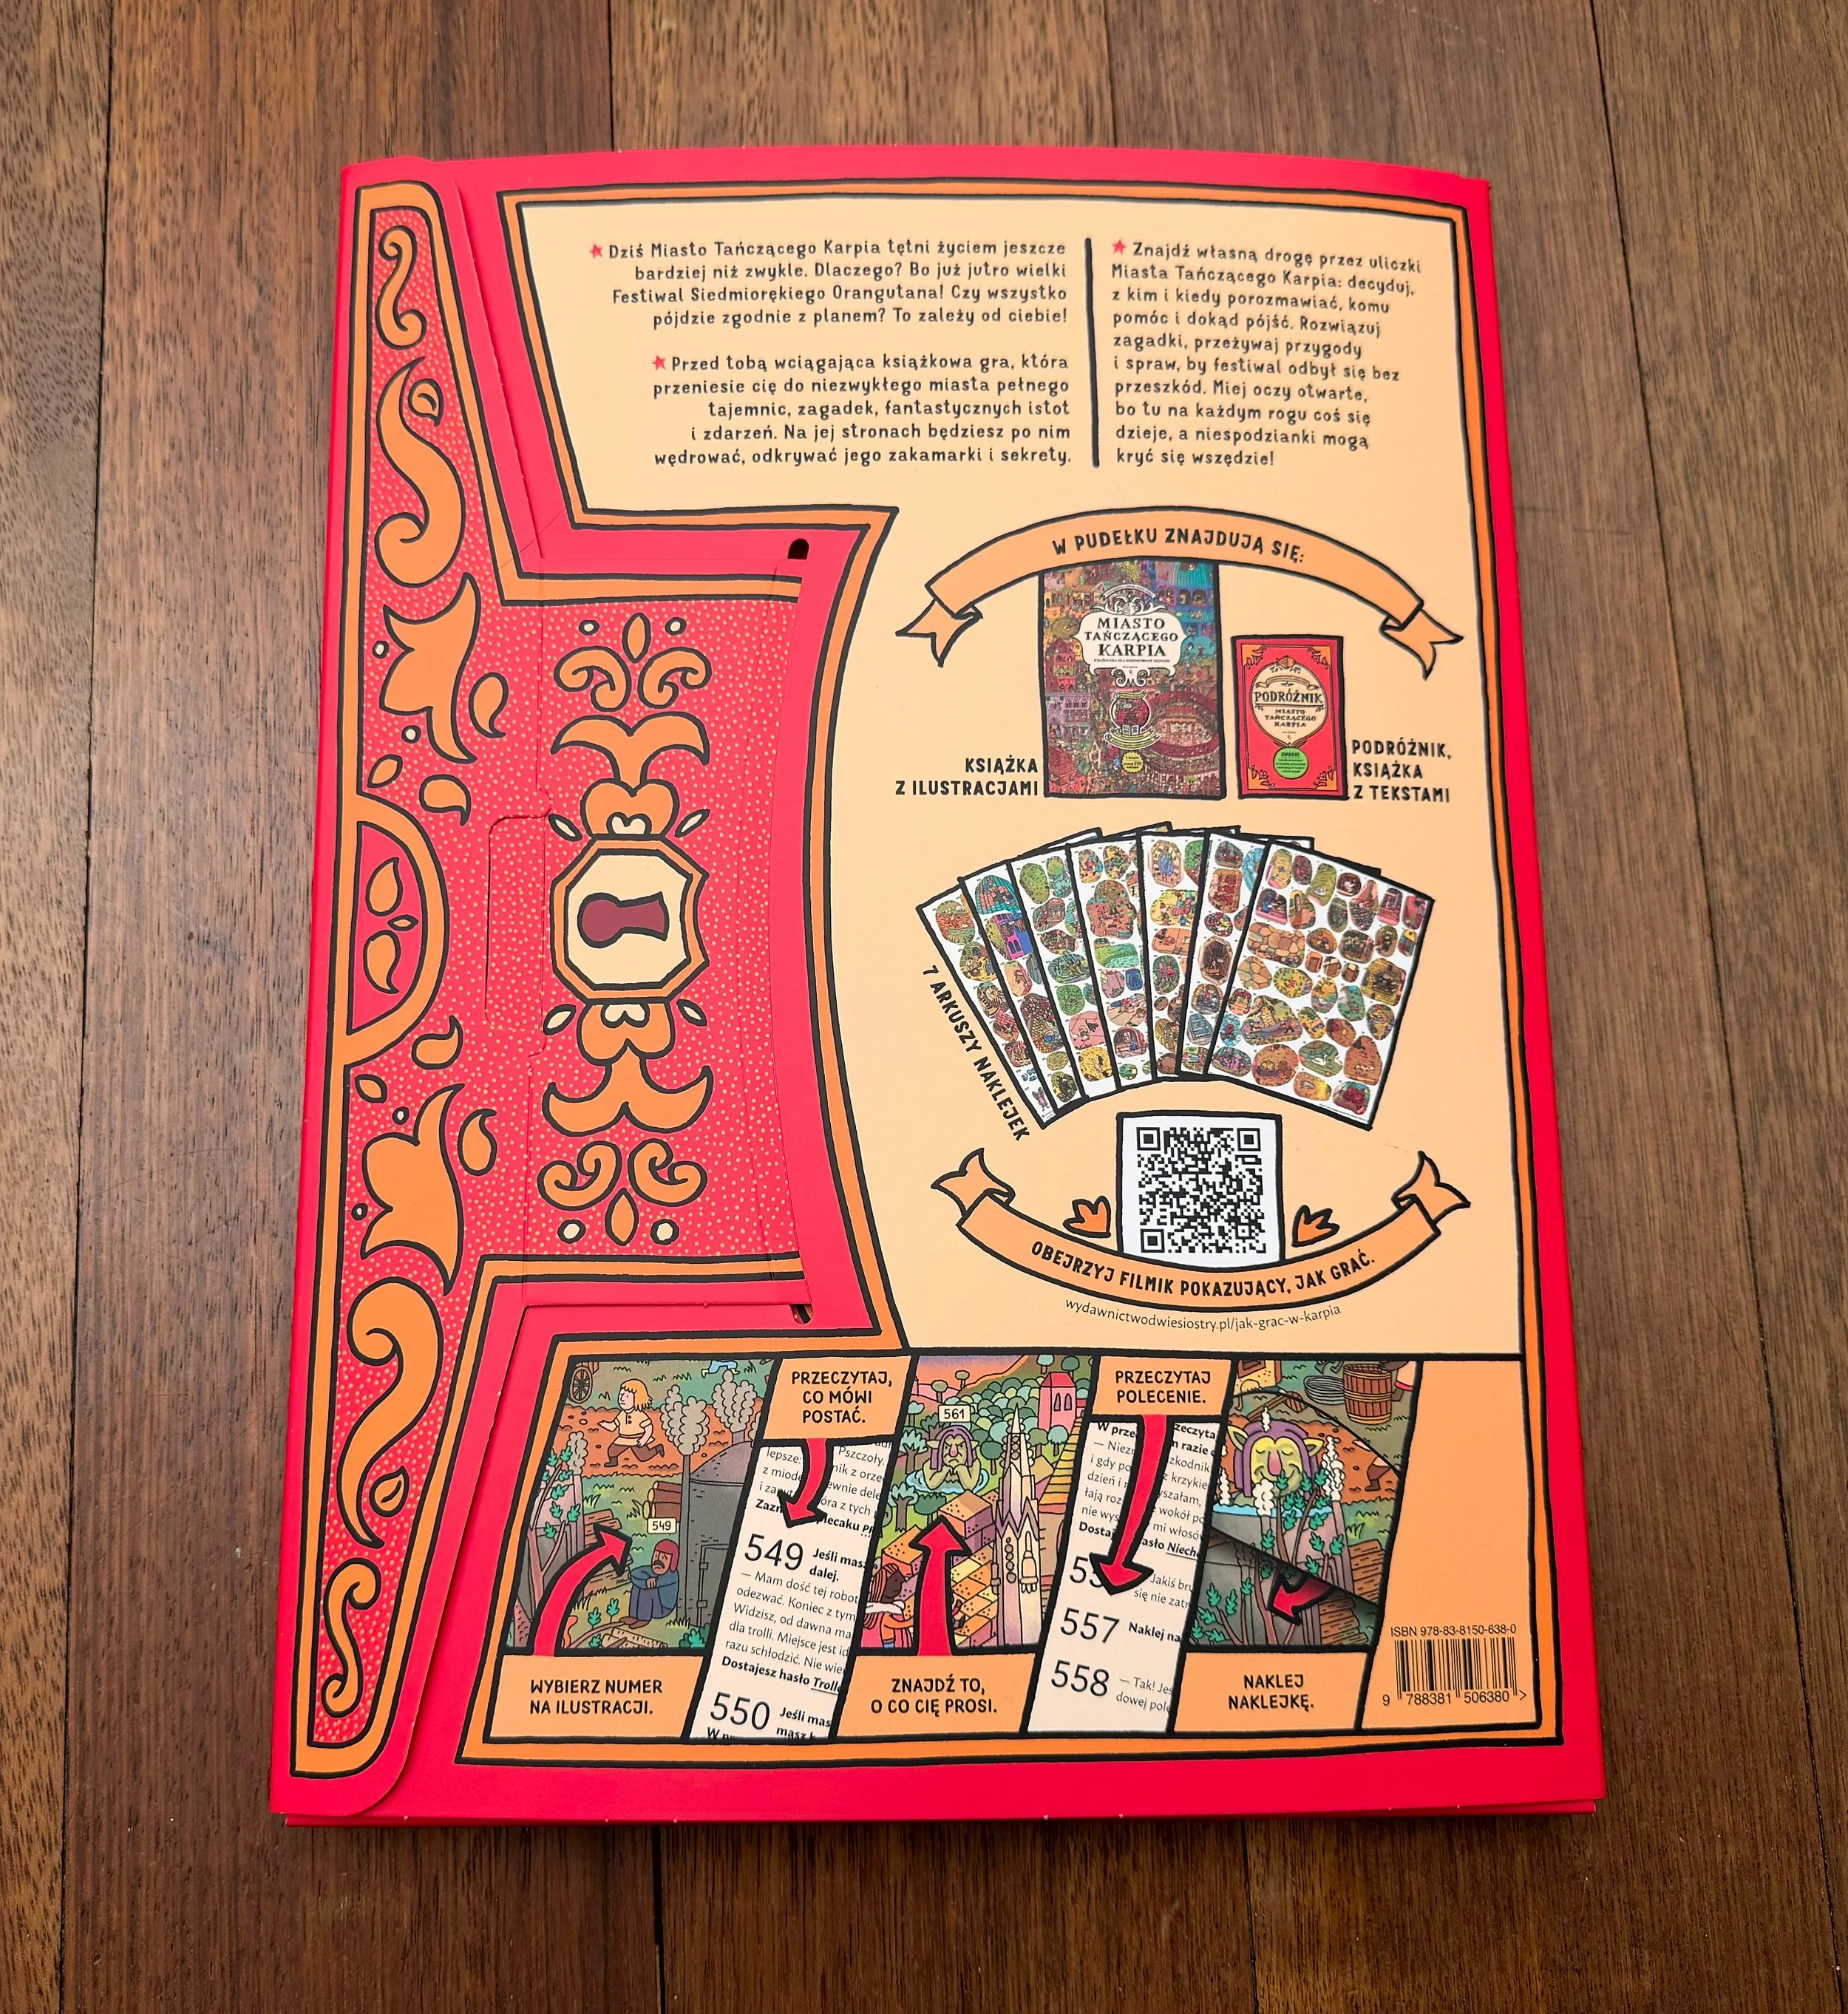
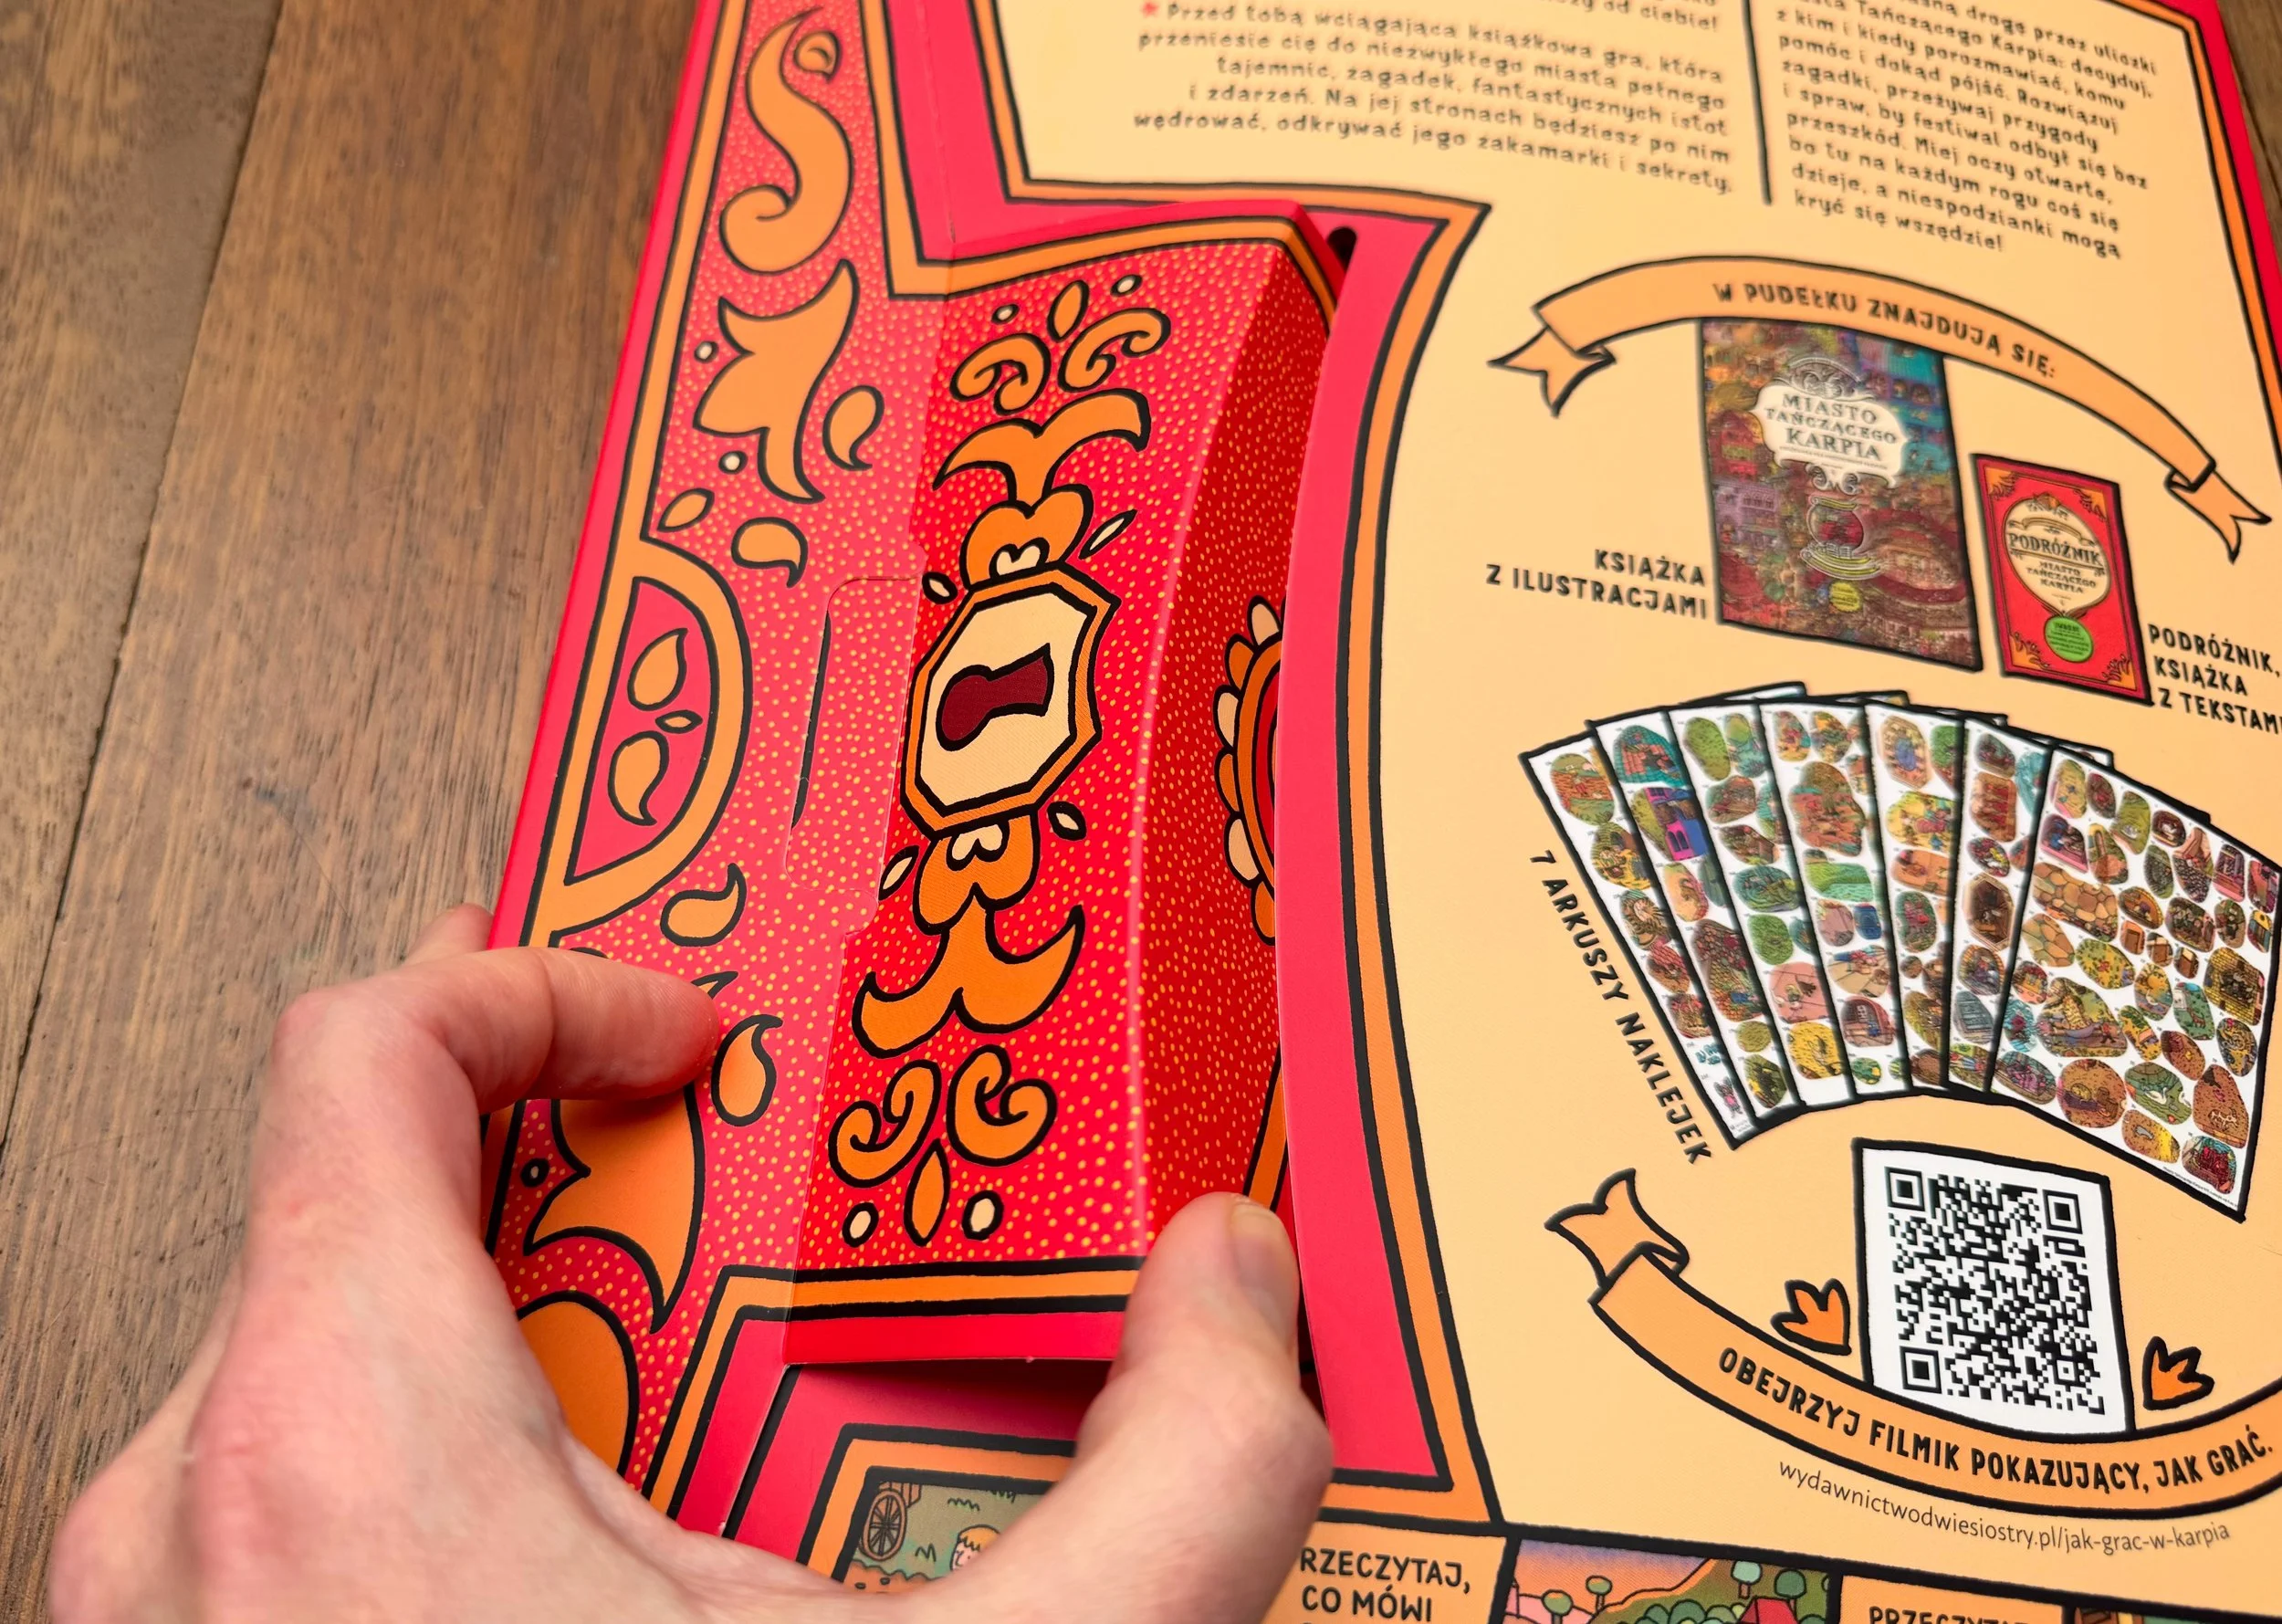
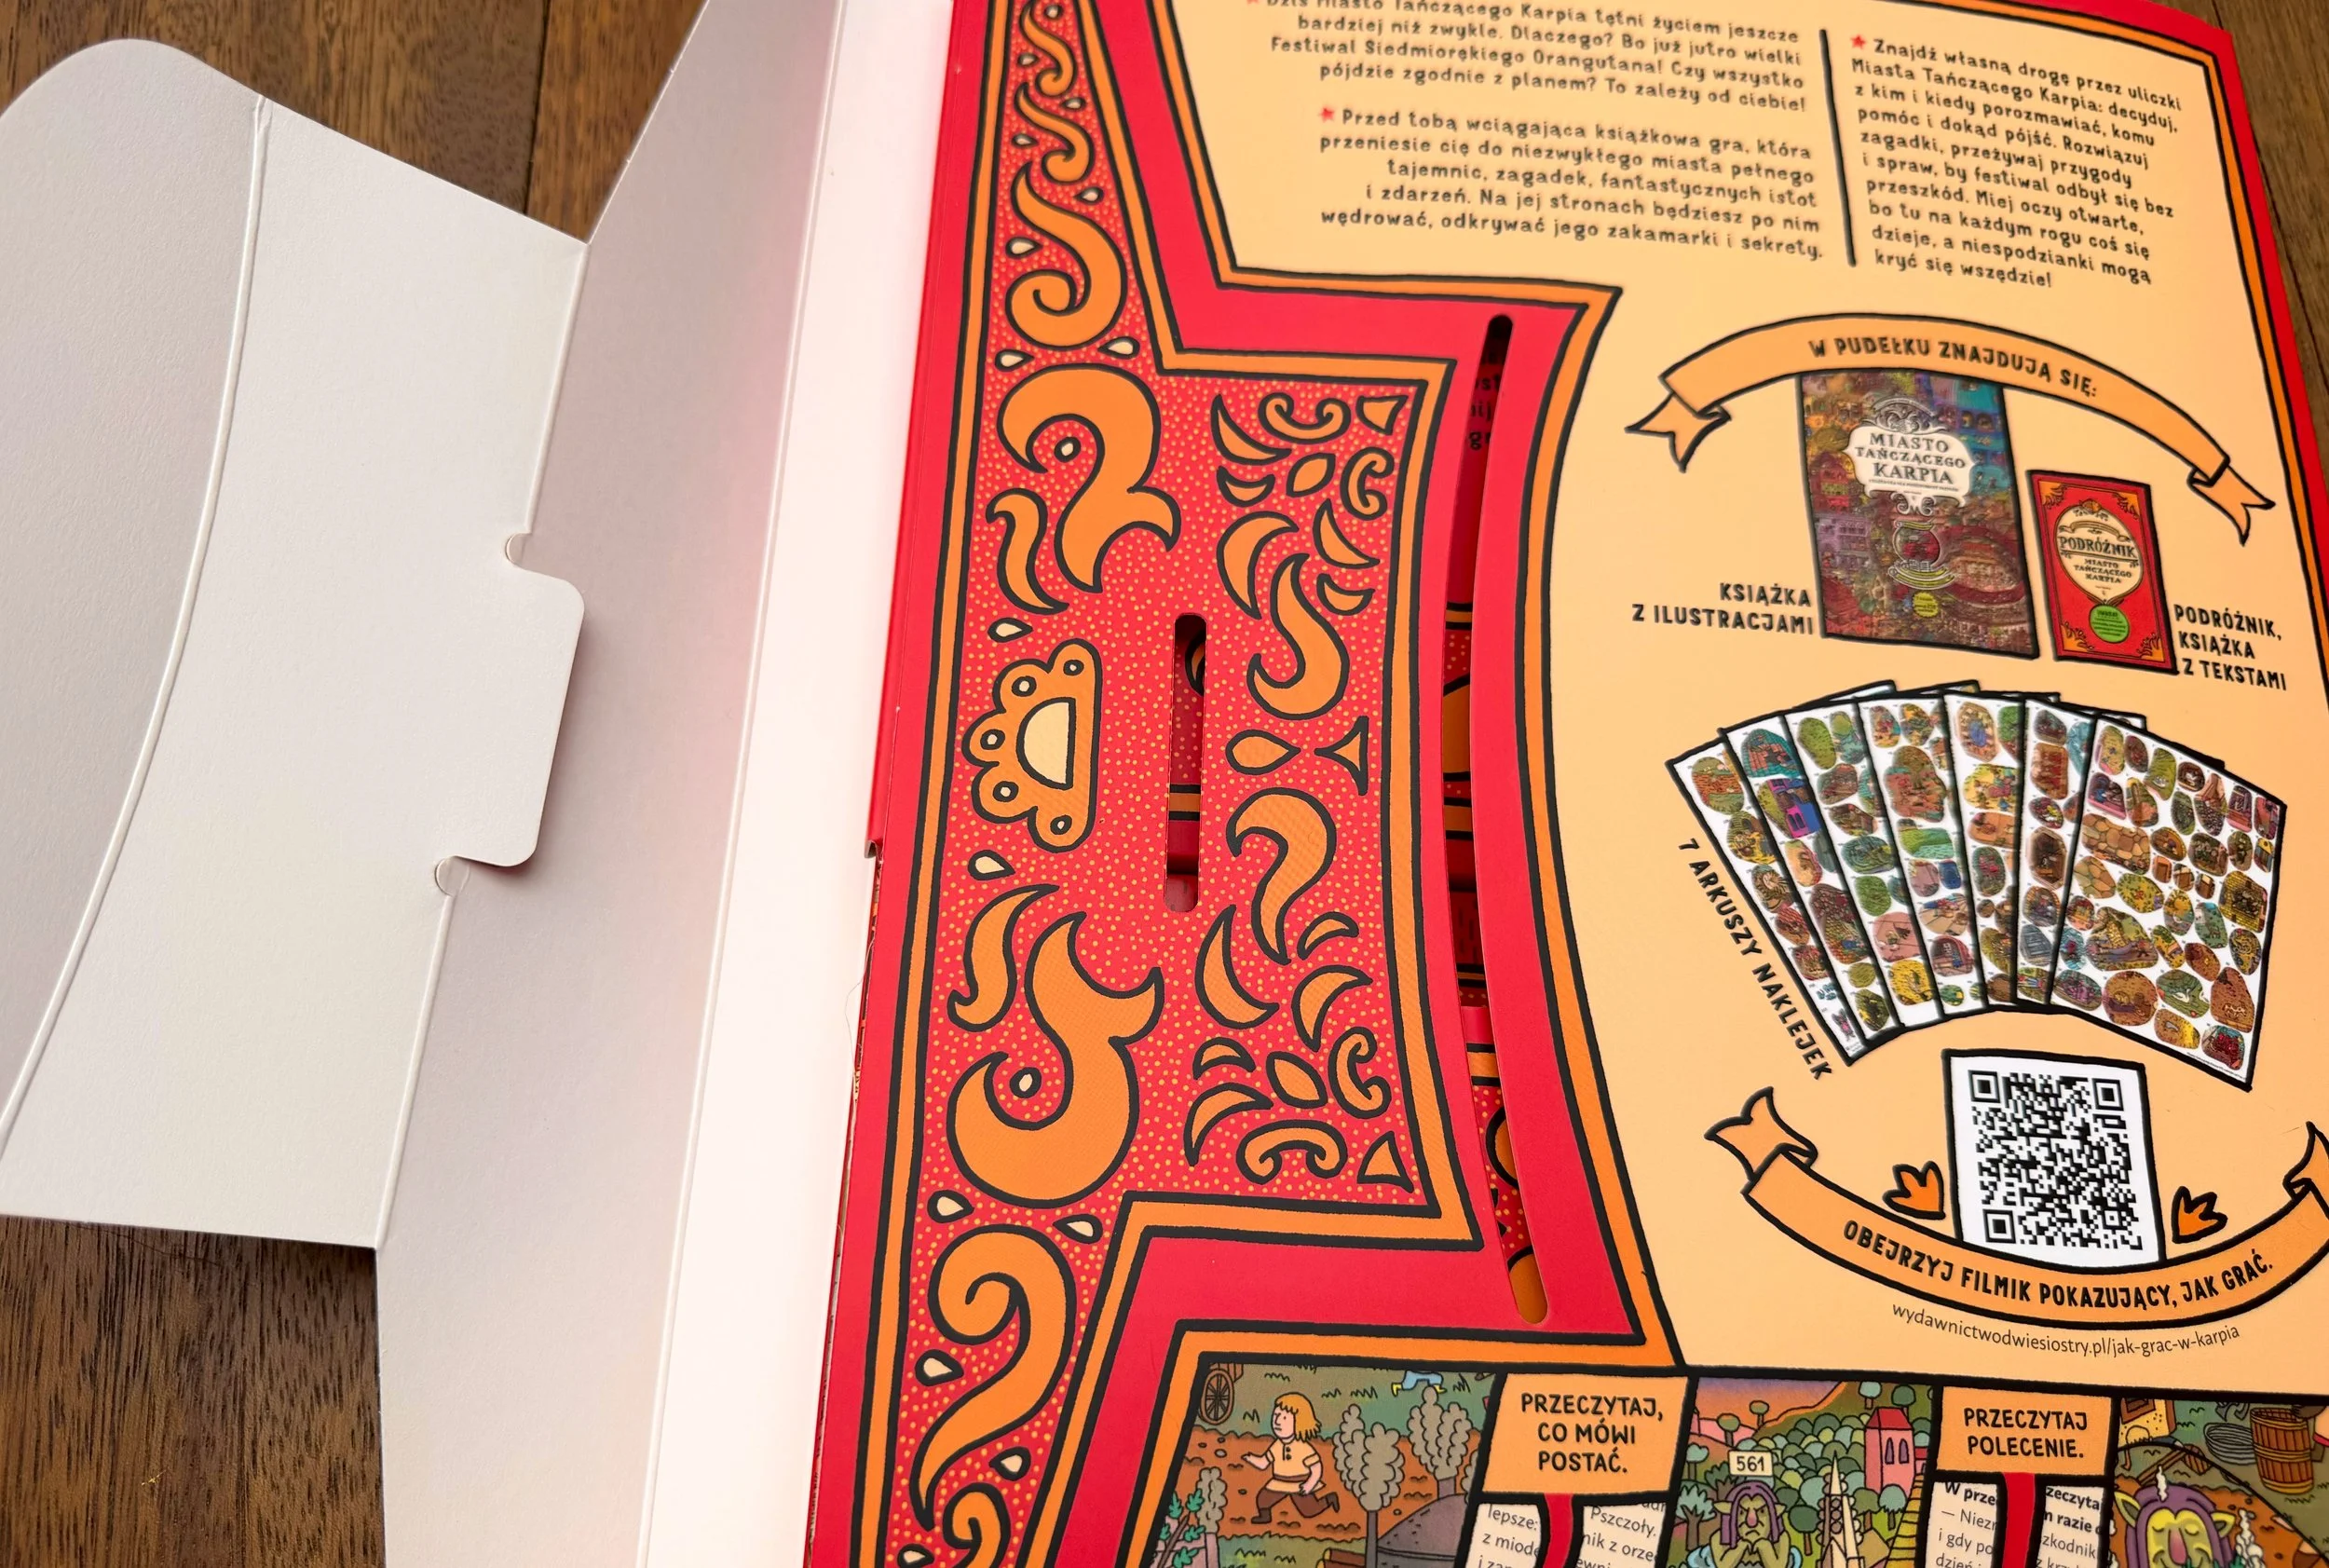
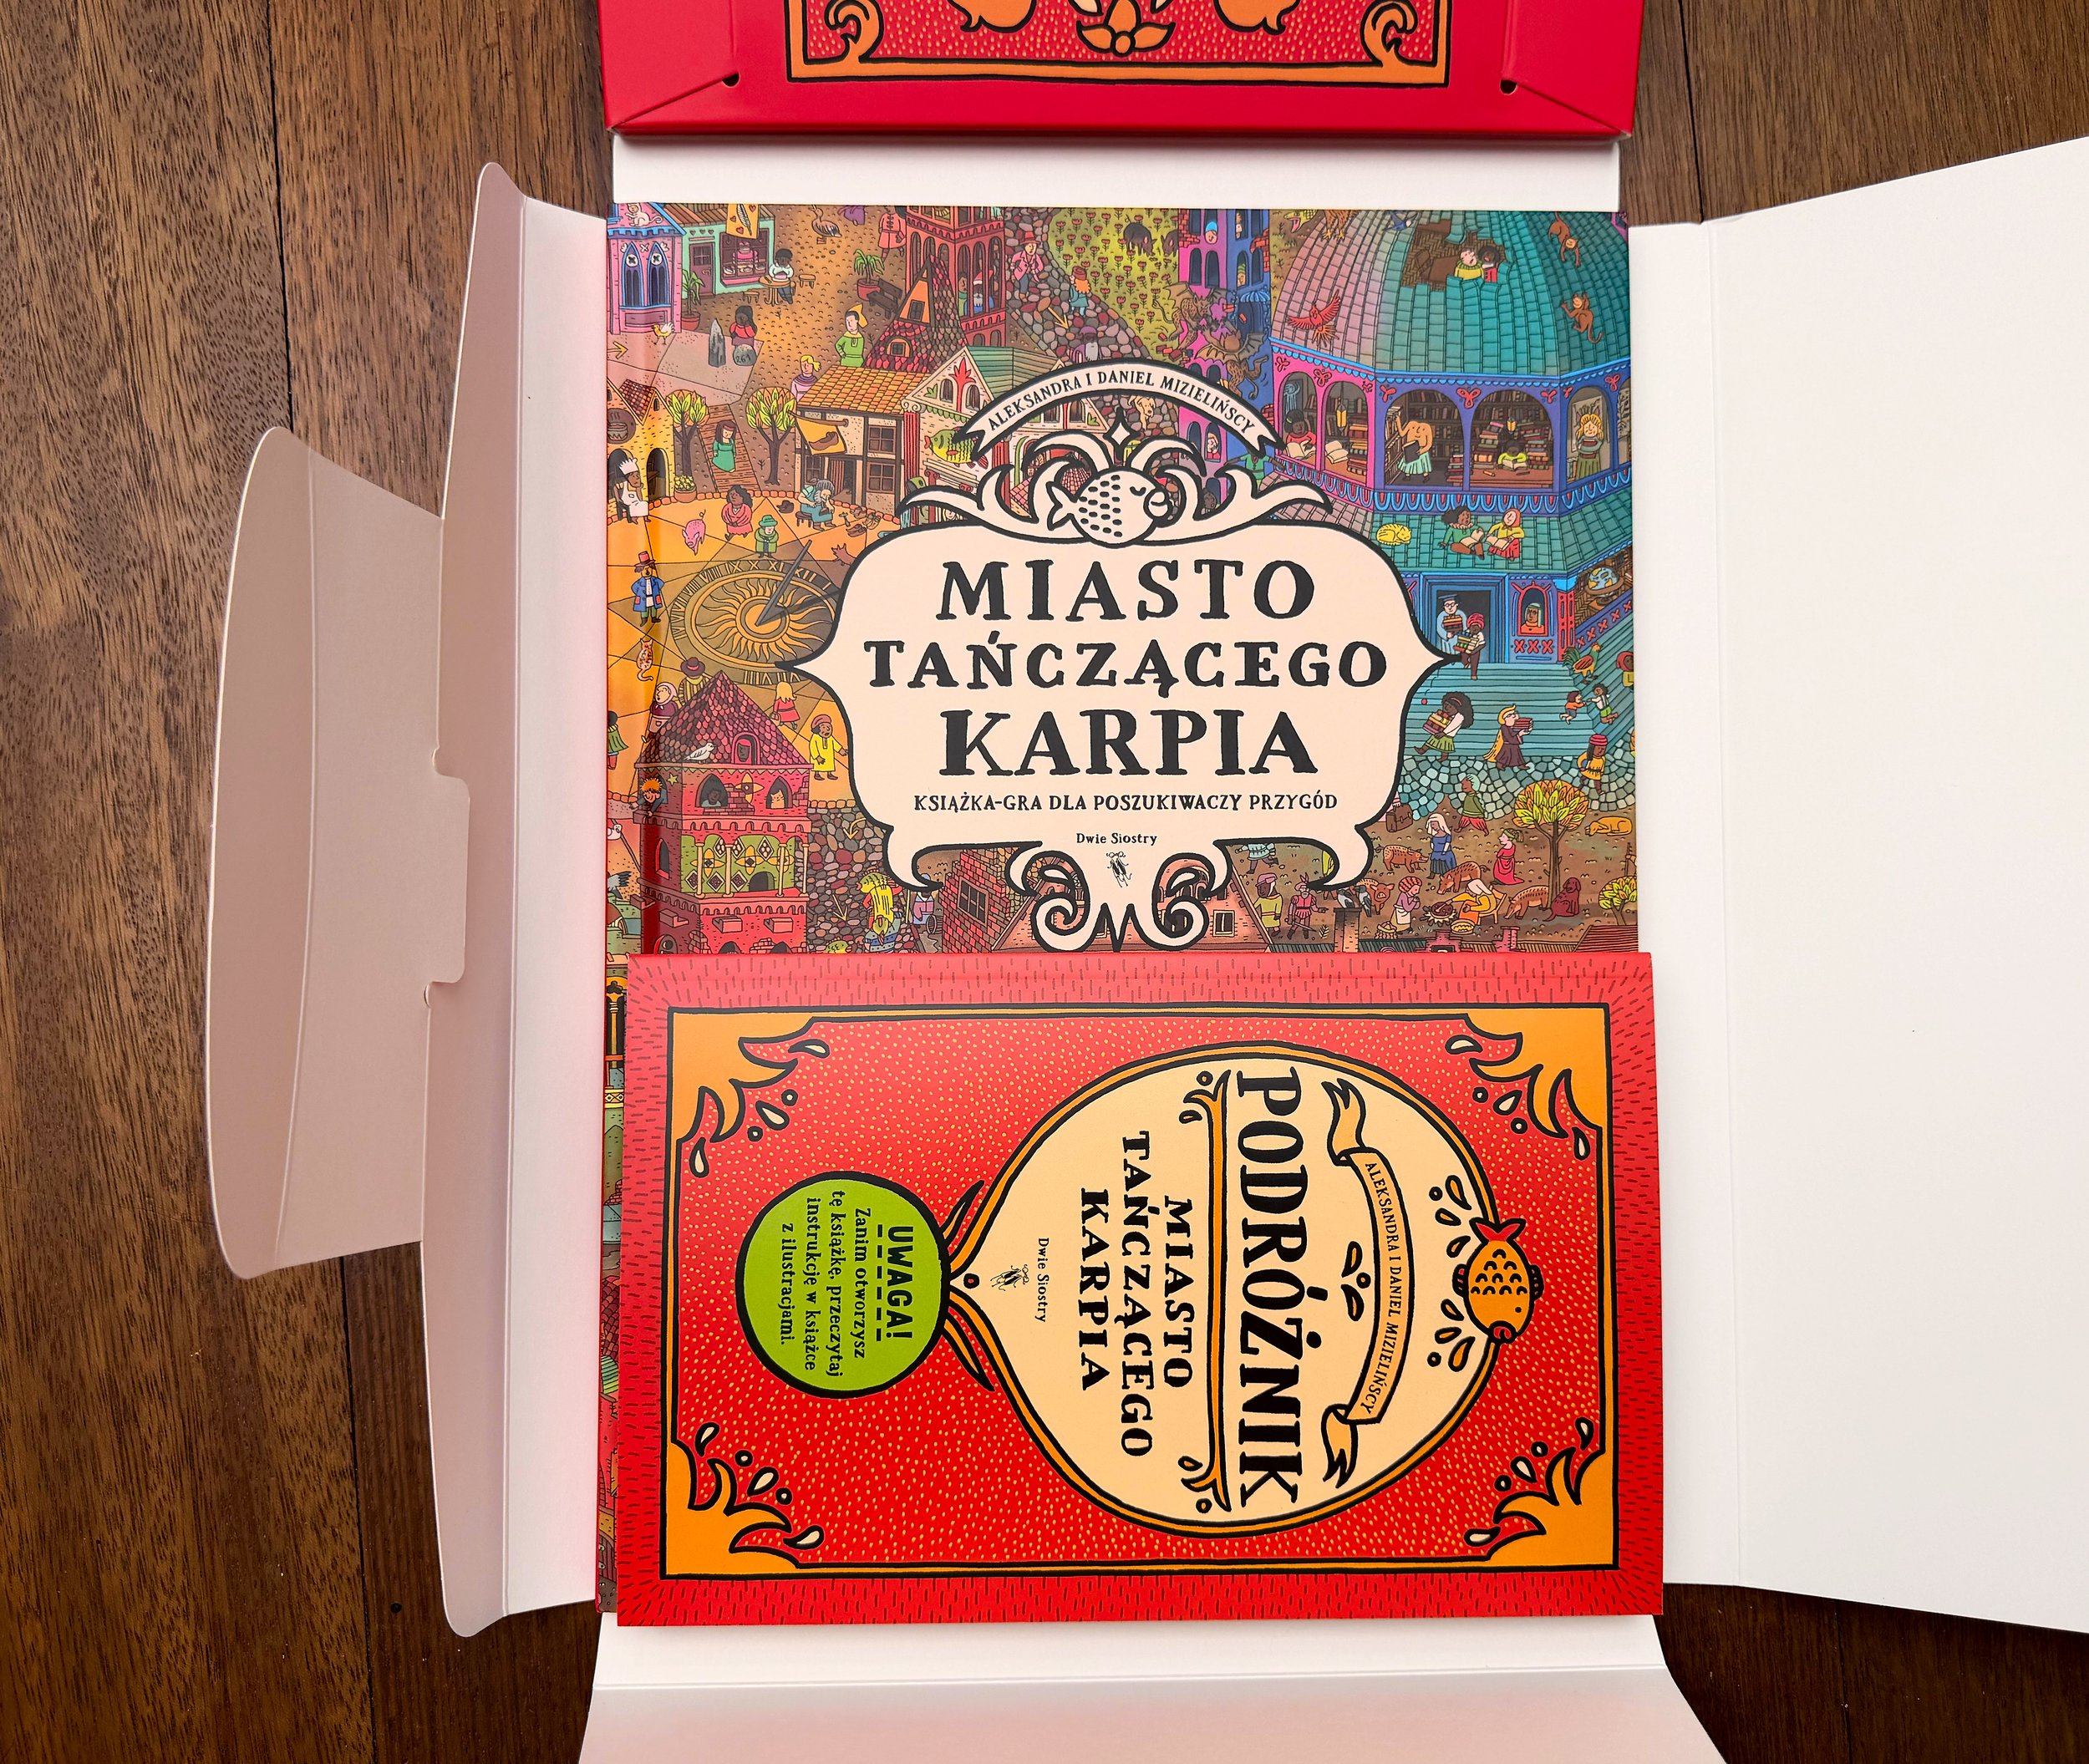
The City of the Dancing Carp consists of three elements: large book with illustrations, The Traveler with black-and-white text, and seven sheets of stickers, which you’ll find inside the large book.
All three elements are sold together as one package. You’ll also need a pencil to play, which you’ll need to provide yourself.


Playing the game is really simple. The illustrated book provides a view of the city, while The Traveler contains everything the characters are going to tell you. The stickers, along with two lists—keywords and items—will help track your progress.
Start with the illustrated book and look for scenes that interest you. The order doesn’t matter; you can choose any page and any scene. If there’s a number next to a person or creature, that means this character has something to say. Grab The Traveler and find the paragraph with the same number. Remember to only read the paragraphs you’ve been instructed to. After reading, you’ll learn what is troubling the character. Try to help them.


That’s essentially how it works. When the game asks you to track your progress by checking off a keyword from the list, marking an item in your backpack, or placing a sticker on the illustration, just follow the instructions.


There are detailed instructions on the inside cover of the illustrated book, but you can also watch a 6-minute video tutorial we created (available in both Polish and English) to help you get started.
Creating The City of the Dancing Carp
The Idea
So now that you know how to play let me take you back and explain a little bit about the design process.
We’ve wanted to return to game design for a while now. Although the idea of going back to making video games was exciting, we knew we wouldn’t have time to do both books and video games simultaneously. Besides, in recent years, the board game industry felt much more exciting and innovative than video games.
At first, we thought about combining choose-your-own-adventure games with seek-and-find books. We already created both (Where is Where is the Otter? as the former, and Mamoko series as the latter) so we knew how to handle it.
During the stages of development, we explored a few other mechanics we liked. Atlas games (like Sleeping Gods), Legacy games (like all seasons of Pandemic, Clank! or my favorite Gloomhaven and Frosthaven) and even open world and sandbox video games, such as our beloved Zelda Breath of the Wild, were a huge inspiration.
In the end the idea was simple: let’s create dense, highly populated city where you can talk to as many denizens as possible.


The Map
Surprisingly, we didn’t start with writing. We began with a rough sketch of a city map. We decided that the entire city would fit on a 5 by 5 grid, totaling 25 spreads and 50 pages. We took a plain A3 sheet of paper and divided it into 25 rectangles. Then we started filling it with important landmarks: a river, city wall, ocean, mountains, university, theater, etc. Each rectangle had to have a point of interest—something that could serve as a good, descriptive feature. This would allow us to direct players, for example, to the southern city gate, city palace, or Sunny Square.
The final map isn’t too far off from that first drawing we made before writing a single story.
Stories
The map was our starting point and inspiration. Whenever we thought of a new storyline, we looked at the city and tried to figure out where the story could take place. Then, we just had to write a couple of hundred unique stories. There were two problems with that: one creative and the other technical.
How do you write that many stories without being repetitive?
How do you track where the stories are happening, where to place all the stickers, and what the numbers are for all the dialogues?
Let’s tackle the creative problem first.
Spicing Up Ideas
The method we used was loosely inspired by the Sparks technique described in Electric Bastionland, an RPG created by Chris McDowall. We called this method “spicing up ideas.” To get started, you begin with a list of simple ideas, writing them down on separate lines. One example could be:
There’s a wedding taking place in the city square.
Nothing special, right? You write a few dozen ideas like that. Then, you go back to the top of the list and start adding a twist—something surprising or out of place. You continue going through the list a couple of times, each time adding something new or changing a detail in a part that was already written. Our example, after the first iteration, might look like this:
There’s a wedding taking place in the city square, but the groom is crying while the bride tries to comfort him.
After a few more passes, you might end up with something like this:
There’s a wedding taking place in the city square, but the groom is crying while the bride tries to comfort him. Behind them stands a worried-looking clerk holding an open, empty box. Their wedding was arranged according to an ancient spell cast centuries ago by Jolanda Kamieniec. According to this spell, a happy marriage can only be finalized with Jolanda’s ceremonial scarf.
But the young couple isn’t in love. The bride is in love with Lana, and the groom has fallen for Oda, the local baker. In a bold move, Oda decides to break tradition. She steals the scarf and performs a ritual, burning it on Jolanda’s grave to break the spell.
We wrote down almost 400 stories using this method. Then, we broke them down into characters, individual interactions, and dialogues. Each time we created a reward in the form of an item or keyword, we added it to a separate list of elements that could be used in a different story. Now, we needed a way to place all the characters, situations, and stickers around the city while minimizing mistakes.
For that, a simple text document wasn’t enough.


The Database
It took us a while to figure this part out. We tried different apps and even considered writing our own tool, but in the end, we used the simplest and most powerful tool: Google Sheets. This may feel like a weird choice, but we quickly realized it was the best option.
Each row in the table represented a single interaction or element that was supposed to be drawn in the illustration or appear as text in the Traveler.
Each entry received a unique ID with a simple structure of XXX-YY, where XXX was the number of the story and YY was the number of the interaction within that story. This allowed us to refer to this ID without assigning a specific paragraph number (the ordering of paragraphs was a later worry). All rows contained a multitude of crucial information. Is this a number on the illustration or an entry in the Traveler? In what part of the city does this take place? Will it be covered by a sticker? Is this a sticker? What is the name of this story? What is the text for this paragraph (if there is any)? What keyword or item was introduced in this paragraph, or what keyword is needed as a condition for this paragraph?
This structure allowed us to generate statistics for events in each spread, lists of keywords and items in the backpack, numbers of stickers on each page, and the count of hidden and visible numbers, among other things.
We could also sort the view of the table in many interesting ways, creating lists of all elements needed to be drawn on a specific spread or lists of stickers for a spread. We could check if we had any repeated keywords, keywords that couldn’t be obtained, or keywords that weren’t used anywhere.
Now, we could adjust the table to show all of the elements for each spread and start drawing the illustrations.


Drawing
Even though it looks like the illustrations would be the most complicated part, after the hurdle of creating and managing all of the stories, drawing was a very relaxing aspect of the project.
All of the illustrations were sketched on 640 mm × 445 mm paper. Starting with the main landmarks and the most important elements of the stories, we methodically filled in all of the empty spaces.
After the sketch was completed and we conducted a rigorous check to ensure that everything needed was drawn, we used a lightbox to trace the sketch onto a final drawing.
Then, after scanning, we colored the image in Photoshop.
The finished illustration was imported into InDesign and downsized to 78%. This way, the image felt even more crowded and detailed.
Finally, we added the numbers, but to do that, we needed to return to our table and assign paragraph numbers.
What Should Be the Order of Things
The order of paragraphs definitely couldn’t be random. After playing many choose-your-own-adventure books, we found that the most annoying part (aside from sporadic infinity loops) was constantly flipping pages from one end of the book to the other. We wanted to locate paragraphs from the same story within close proximity to each other—not so close that readers would accidentally reveal the end of the story, but still no more than a few pages apart.
To ensure this worked correctly, we organized it by hand in our already incredibly helpful Google Sheets table. This allowed us to keep track of the flow and maintain a logical progression through the stories.


A Little Bit of Scripting Takes You a Long Way
This part may be too nerdy for most readers, but let it be here as our own designer's diary, so we can remember how this was done when we make the second volume.
The big question was: how do we transfer this magnificent spreadsheet to (preferably already styled) text in Adobe InDesign?
Fortunately, before putting in all this work, we tested something called Google Apps Script—a powerful, JavaScript-based platform that enables you to modify your Google Docs with scripting. In other words, we could write a function that grabs all the data from our table, styles it with rich text, and dumps it all into a Google Doc. From there, we could export it to a Word file and import it into InDesign while keeping all the styles. This way, all the paragraph numbers and references, backpack items, and keywords would already have a different color assigned to them. For example, we could replace all blue characters with a character style for paragraph numbers. This was all automated to minimize any errors we might make during the copying and pasting process.
I won’t lie. I’m very proud that I was able to pull it off and that it worked as well as I had hoped.


Preparing the Stickers
The last element was the stickers. Returning to our trusty table, we could generate a list of stickers for each spread. We would then take the finished drawing of that spread, place it on a light box, cover it with another sheet of paper, and start drawing the updated image.
In Photoshop, we created a copy of the original illustration and called it the "sticker layer." In that file, we made all the changes introduced by the stickers on that spread. If there were any stickers that would go on top of other stickers, we created additional Photoshop files.
The sticker layer was then added to InDesign, where each sticker was traced with a Bézier path. We would offset the path from the main character by exactly 3 mm, and finally, we added a 4 mm bleed to the illustration.
Then it was just a matter of arranging the stickers on the sheets (we were supposed to have a maximum of five sheets of stickers but ended up with seven) and changing the IDs of the stickers to the correct numbers.


First prototype and a Lot of Testing
When both the books and stickers were ready, we printed the first mockups. We didn’t have the covers or the instructions on how to play, but we could give it to our first playtesters (Zosia Frankowska, Filip Jędrzejewski, and Asia Rzepecka). We printed five copies, and to my surprise, we could even order the kiss cut for the sticker sheets.
The initial feedback was very helpful. Some of the stories needed additional hints, and some didn’t have satisfying endings. We added 20 more stickers and about 50 entries in the Traveler.
Of course, our main tester was Maciej Byliniak – the editor. It took him a couple of weeks to edit and check everything. There were over 1,000 comments in his first edit.
After more testing and a series of edits from Maciek, we printed the final prototype. The illustrated book was printed as separate pages to lay it all out for faster testing (we had just a few days until sending the files to the print house). Fortunately, we didn’t find any new mistakes.
The Packaging
Just a few weeks after the launch of the book, we knew that shrink wrapping was not the best solution for packaging the game. We needed a way to keep all the elements together, but in a way that would allow people to browse them in a physical store. That was also a non-negotiable condition we got from foreign publishers.
So we started working on some ideas for a case. We had already seen some good cardstock slipcases, but we needed a way to combine two books of different sizes. The case had to be closable and had to hold the smaller book in a way that would prevent it from moving around to avoid damage during transportation.
After a lot of different ideas and prototypes, we ended up with a solution that you can see below. The box-like flap prevents the Traveler from moving, and a locking mechanism on the back lets you close everything up after you finish playing.
The case was a big success. After the next print run, we even decided to add a nicer anti-scratch finish and gold foil on the front.

Workshop and promotion
This book is not like any other book of ours. It’s a game, but it’s sold as a book, so it’s really important for people to see how it plays. The mechanics are very easy; you just need to remember to start with the illustrated book, find a number, and check it in the Traveler. That’s it. The Traveler will tell you what to do. But people don’t know that before their first play.
That’s why we put a lot of effort into creating video instructions, stories, and reels for social media where we show examples of stories and riddles to solve.
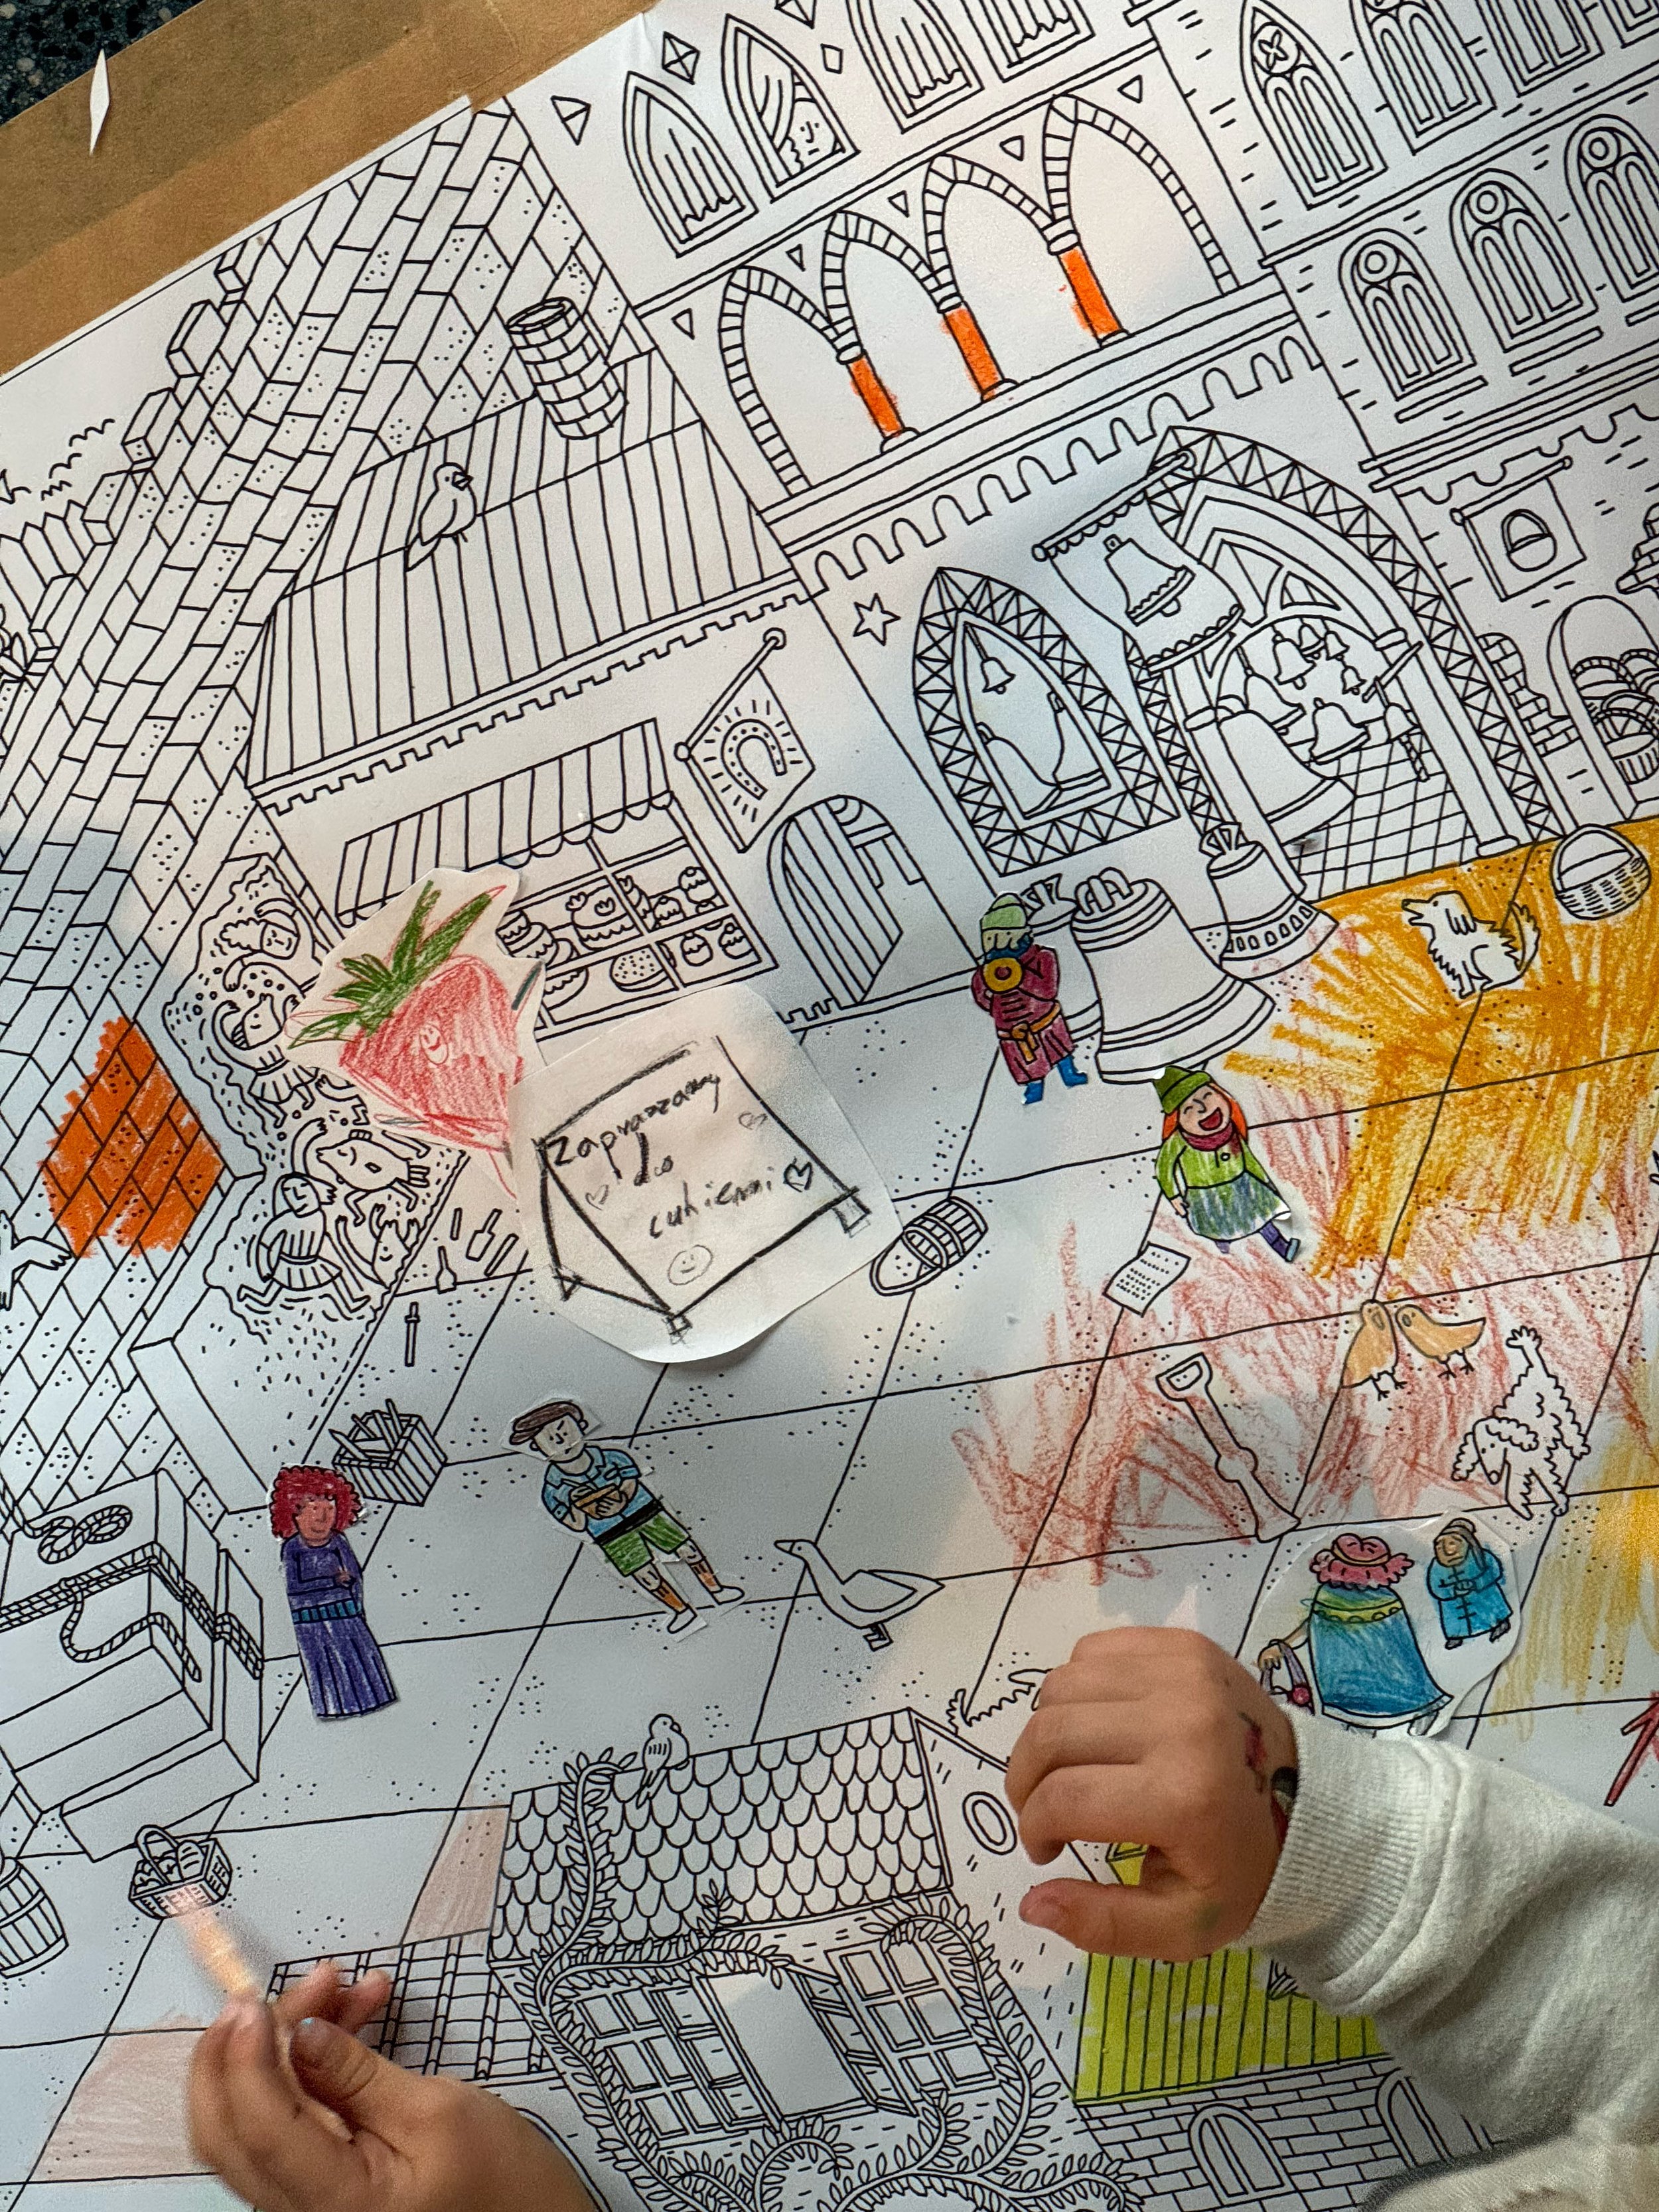
We also ran a few workshops for children where we described our creative process. Together with the workshop participants, we repopulated an empty city with denizens and stories.
This is how the workshop worked:
We moved all the people from four neighboring spreads of the book to separate A4 sheets of paper. Next, we created 100 different story starters. For example:
…a mysterious haint has appeared in the city. It warns the residents about…
Kids would draw a random prompt and select a few characters from those that were removed (they were printed and cut beforehand). The task was to create a story using those elements as inspiration. After 30 minutes, we would gather around a city filled with new stories, and whoever wanted could tell us their story.
In the middle of the first workshop, I was afraid it was a failure because the kids were drawing and coloring the illustrations, but I thought they weren’t developing any narrative. To my surprise, when they stopped drawing and I walked around with a microphone asking who wanted to describe what their characters were doing, we were flooded with wonderful riddles, tasks, and stories.


Foreign editions
German, Carp City, Moritz Verlag, 2025, ISBN: 978-3-89565-480-0
Spanish, La Ciudad de la Carpa Bailarina, Maeva, 2025, ISBN: 979-13-87664-42-8
Czech, Město Tančícího Kapra, Host, 2025, ISBN: 978-80-275-2679-6
Italian, La città della Carta Danzante, L'ippocampo, Milano, 2025, ISBN: 979-12-5673-073-5
Chinese Simplified, Title TBA, Beijing Yuanliu Classic Culture Ltd.
You can find a Google Sheet with a list of all our foreign editions here.


